The middle bedroom. Before.
AFTER
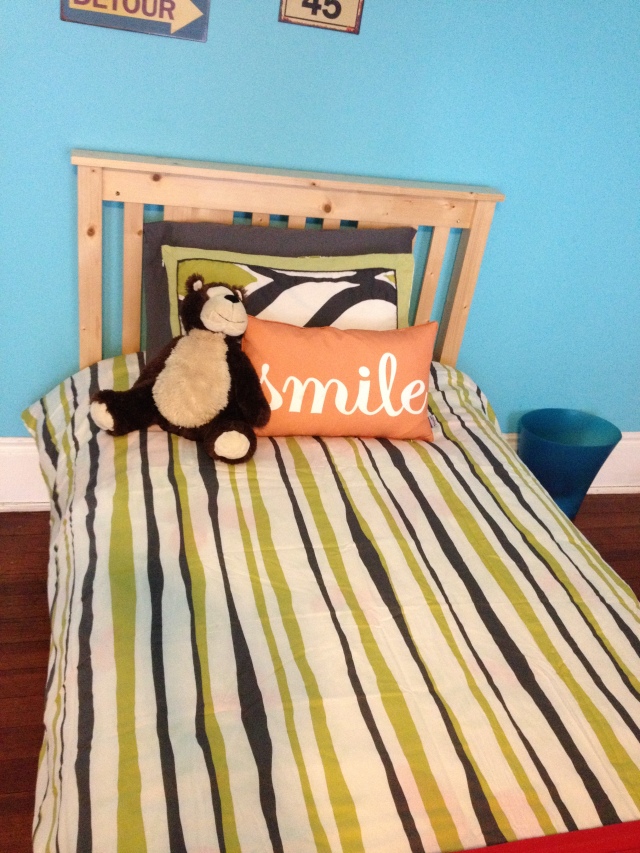
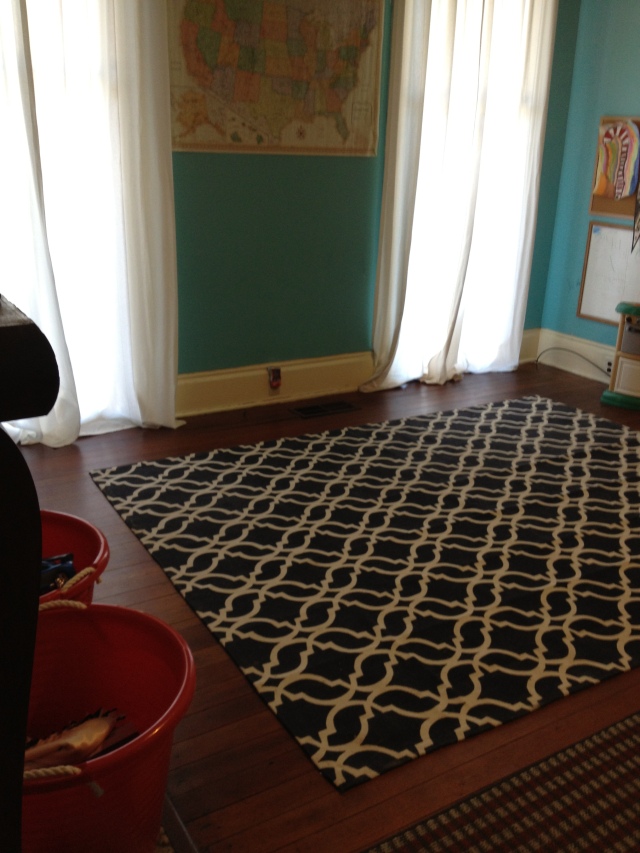
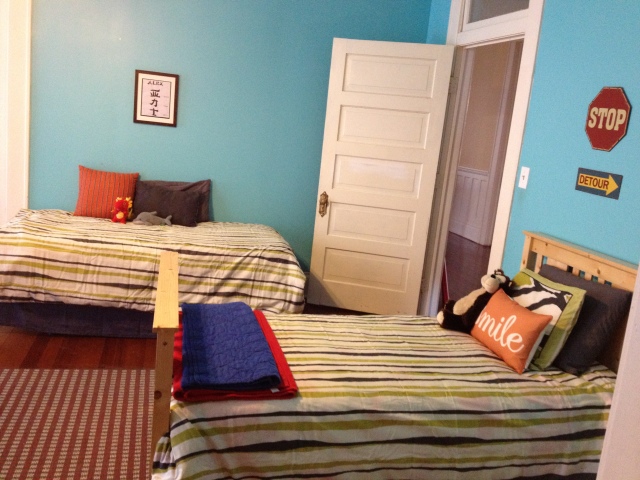
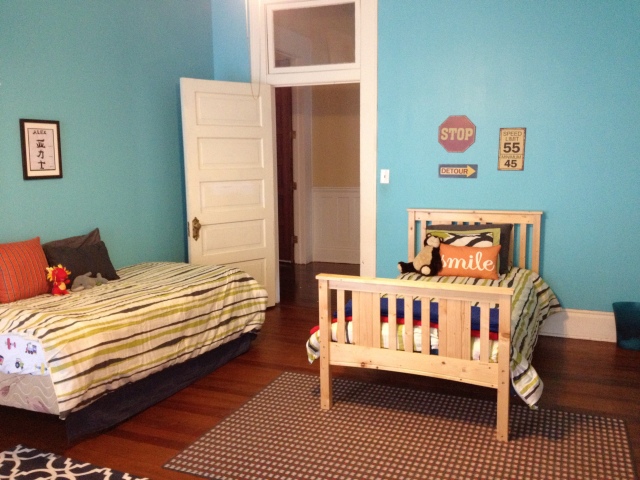
The middle bedroom. Before.
AFTER
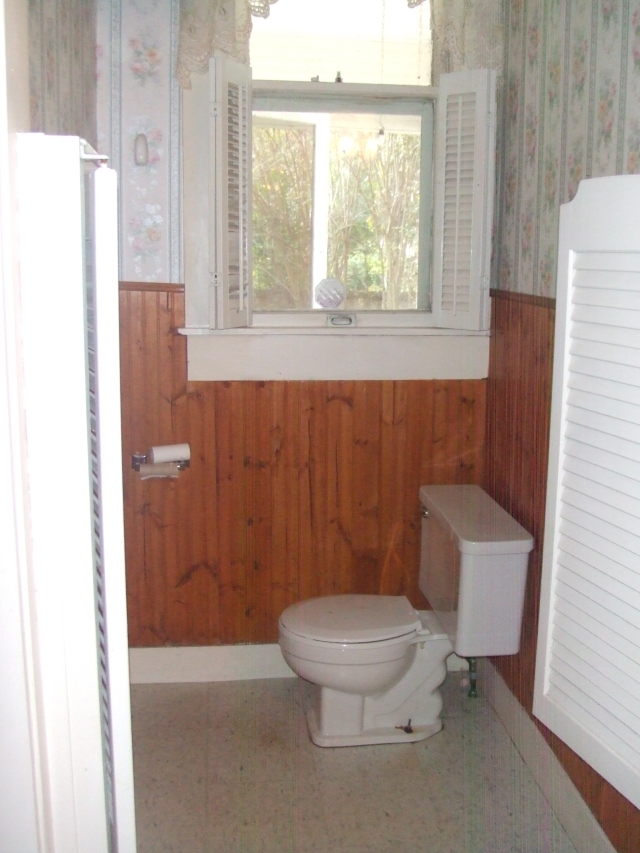
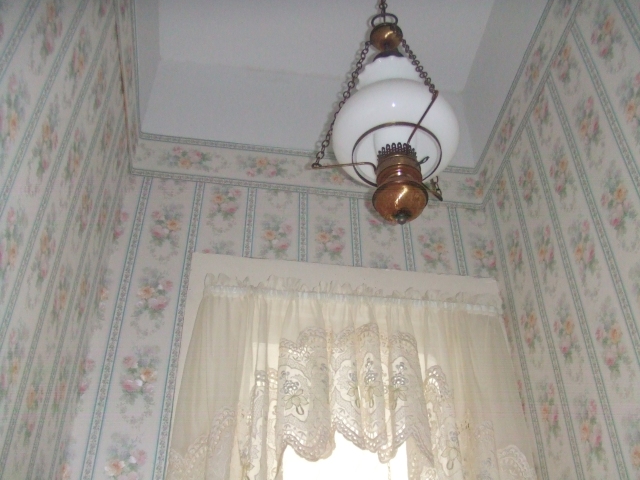
This is a really fun one. This bathroom was so awful. We will start with the realtor walk through pictures and then show pictures of present. We just completely gutted and updated the bathroom this year. In the middle are pictures where we put down some vinyl and updated it a little and that is the way it stayed until this year, 2015, with all new plumbing, flooring, closet, etc.
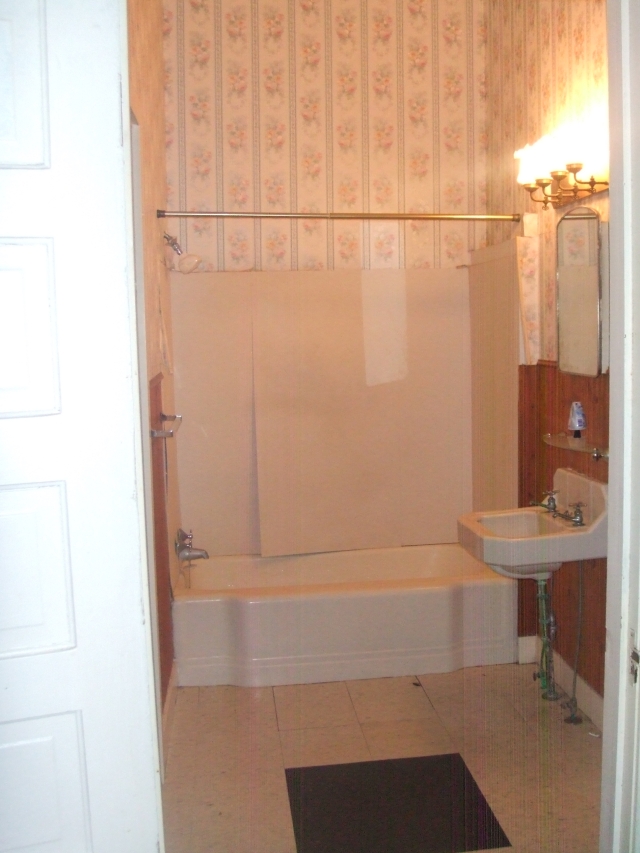
Yes, there were swinging bar doors to the toilet….
Here are a few pics of what I tried to do to make it look better.


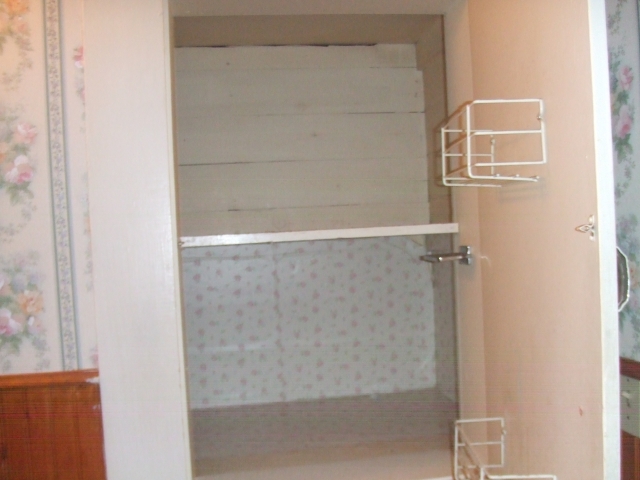
Then, my brother ripped out the toilet, flooring, lighting, bathtub, etc. and put it all back together again. We lowered the ceiling a couple feet so you didn’t feel like you walked into a cracker box every time you passed over the threshhold. We also added a fan, new beautiful ceramic flooring in a chevron pattern. We also gutted the closet and put a new door in and re-engineered the shelves.


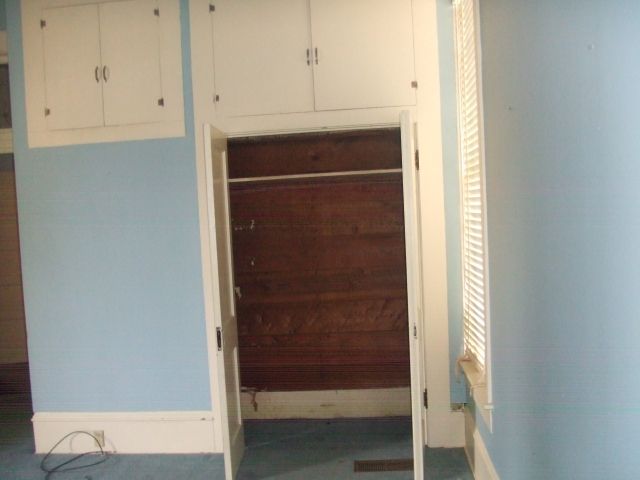
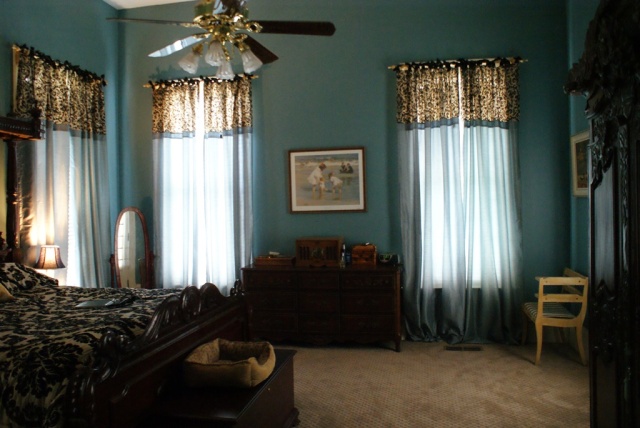
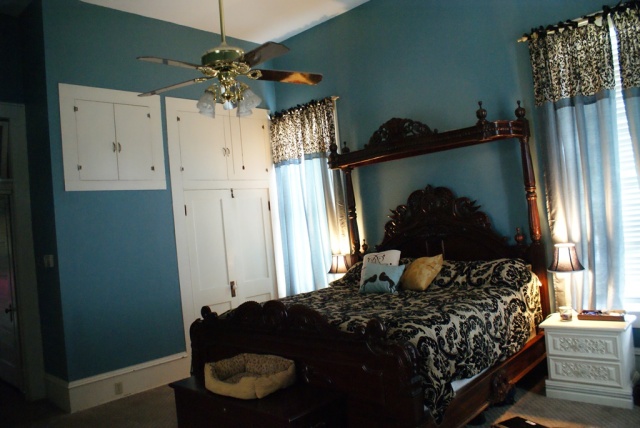
Continuing on today…it is rainy and I thought I might as well finish out the before and after posts. Here is the master bedroom. It starts with the realtor walk through, then proceeds on to what it looked liked for a couple years before we painted. Finally about 2 years ago we got rid of the horrific blue carpet and I tried quite valiantly to remove the black paper that was stuck to the hardwoods. I finally gave up and had Lowes install new carpet.
REALTOR WALK THROUGH- I guess these are the only 2 pictures I took.
PAINTING


I couldn’t decide on the color, so I tried several before settling for Benjamin Moore’s Hemlock.
I then put up some CURTAINS, finally!


Click here for the install of the NEW CARPET AND HERE IS WHAT IT LOOKS LIKE PRESENTLY.
SONY DSC
SONY DSC
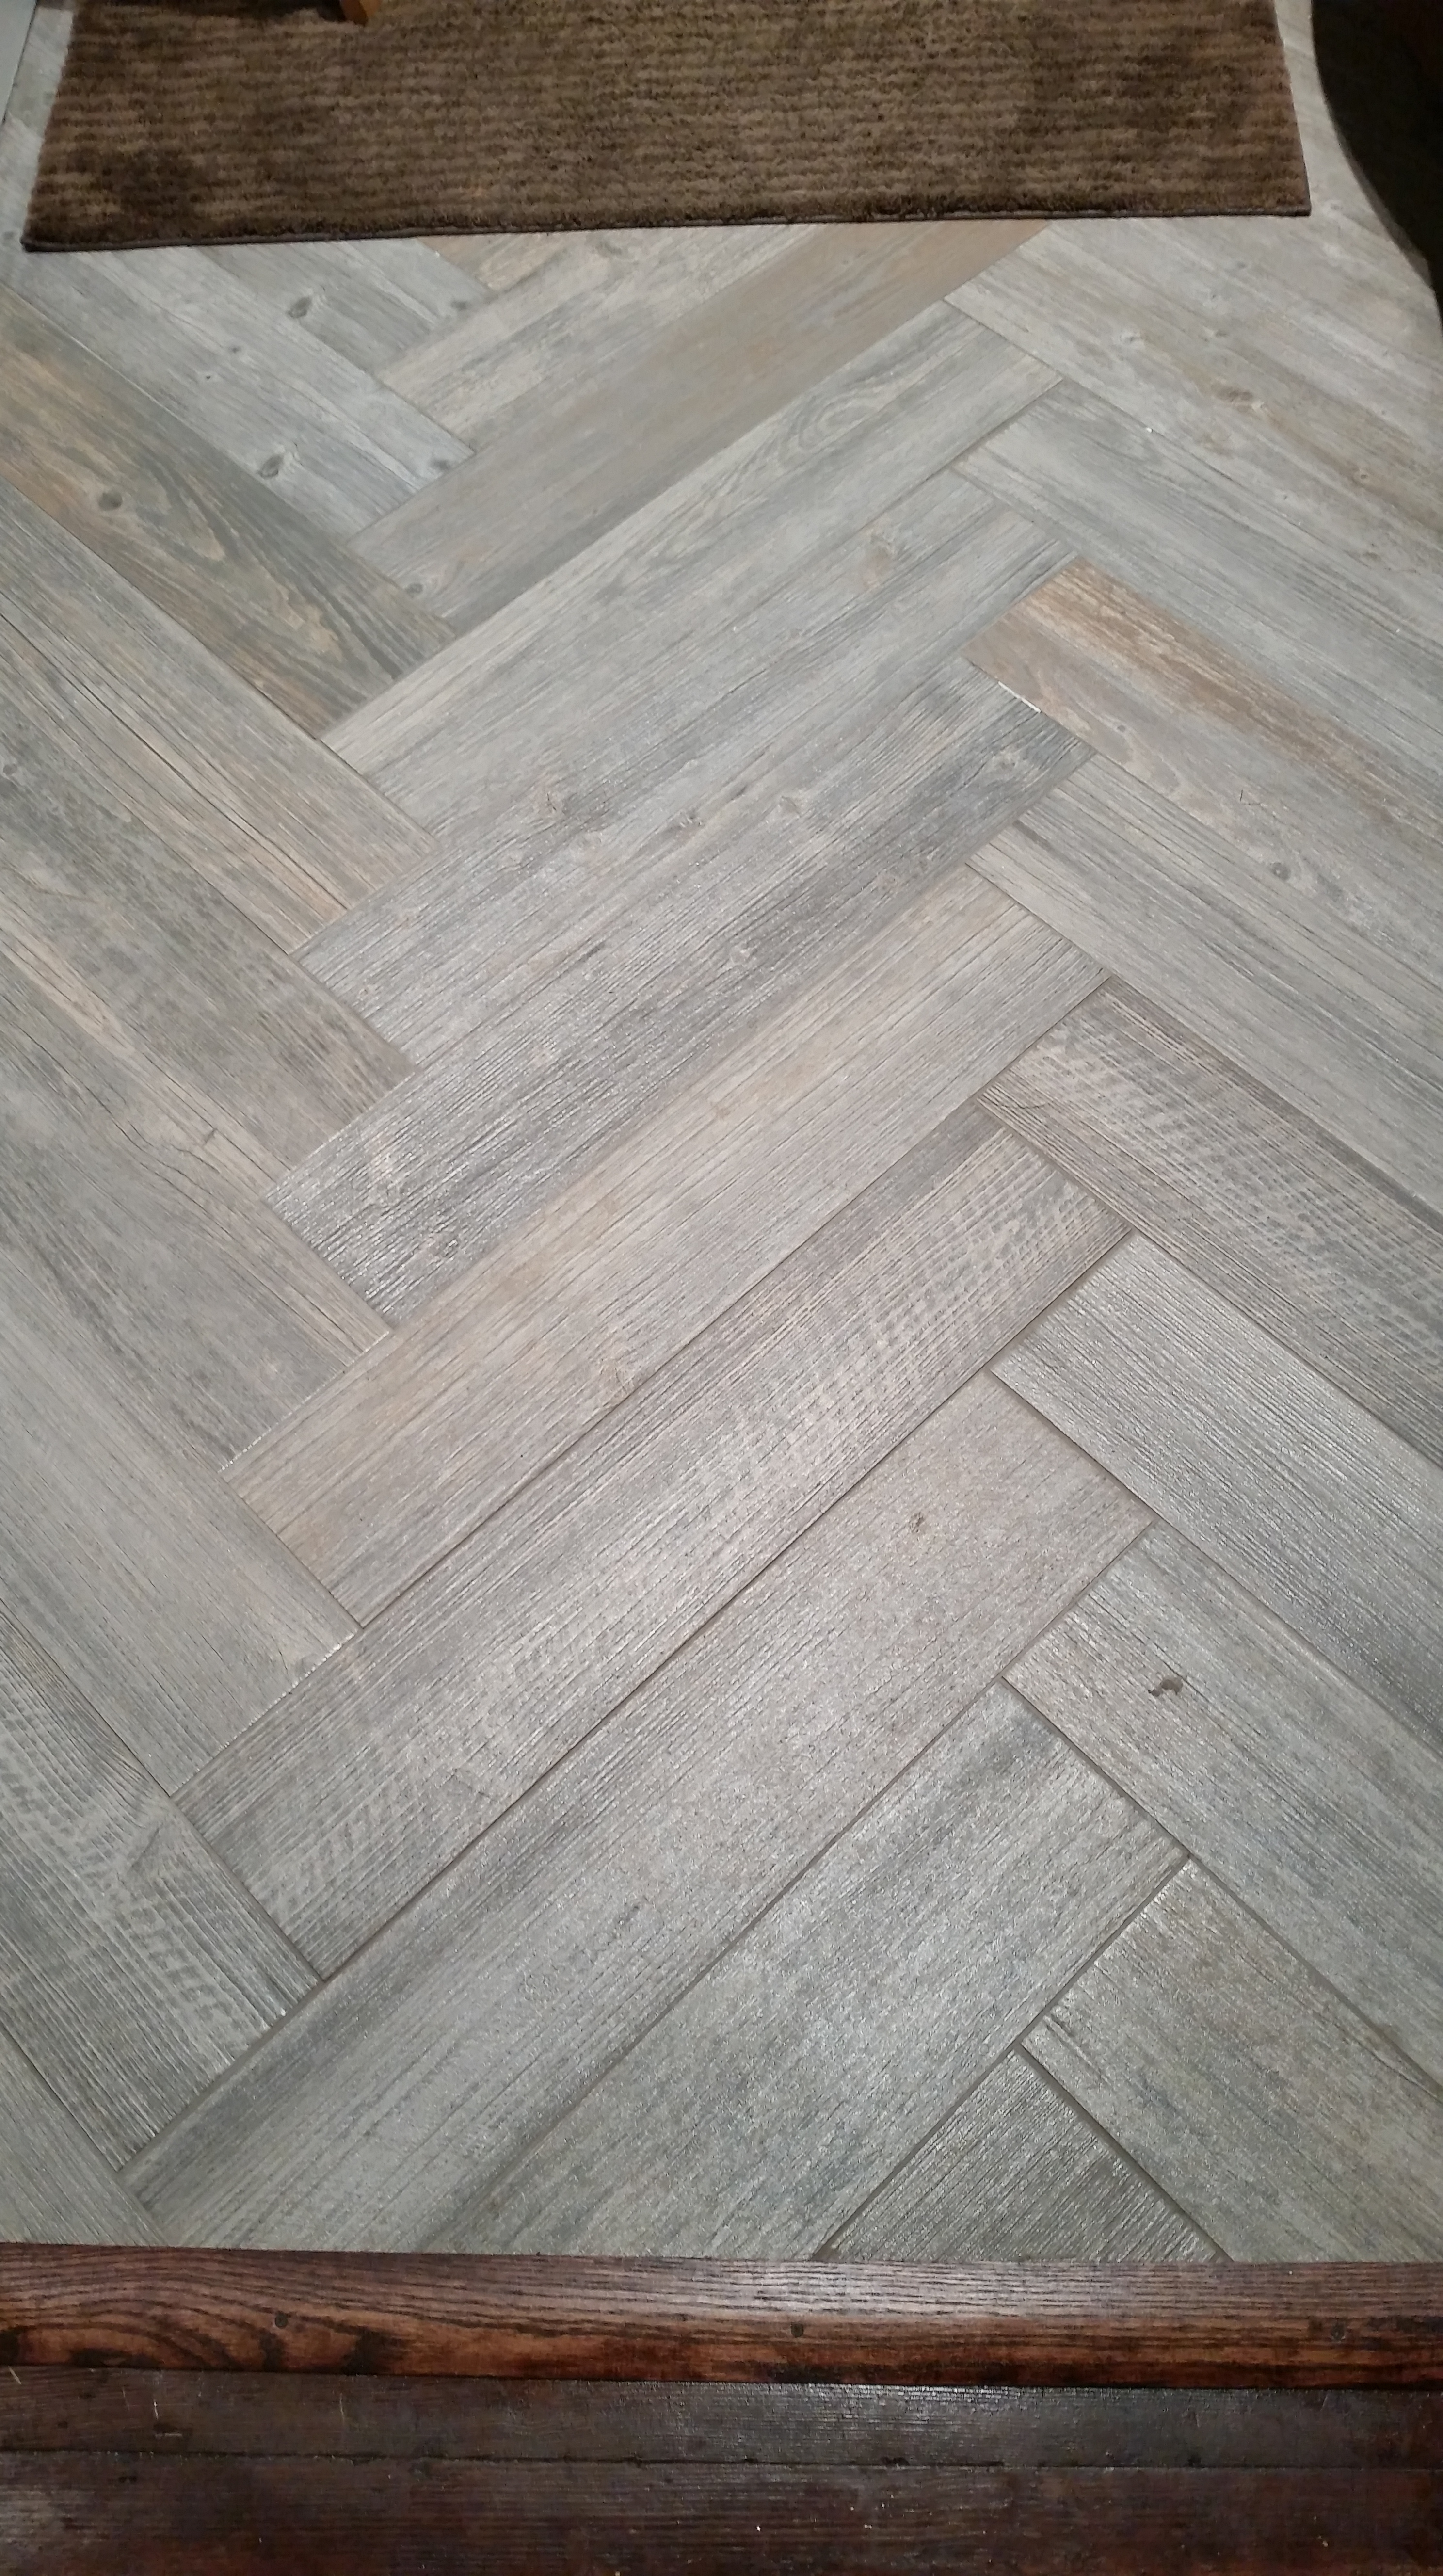
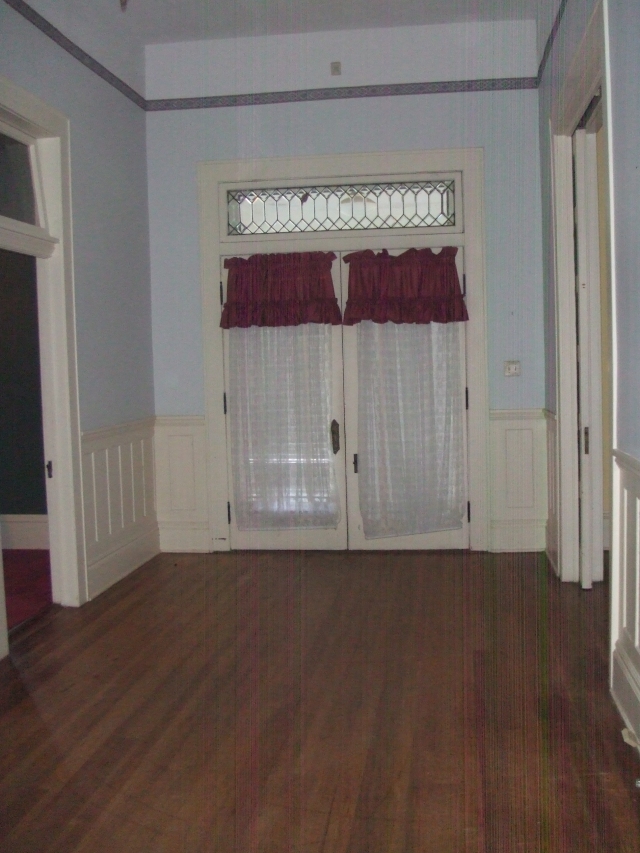
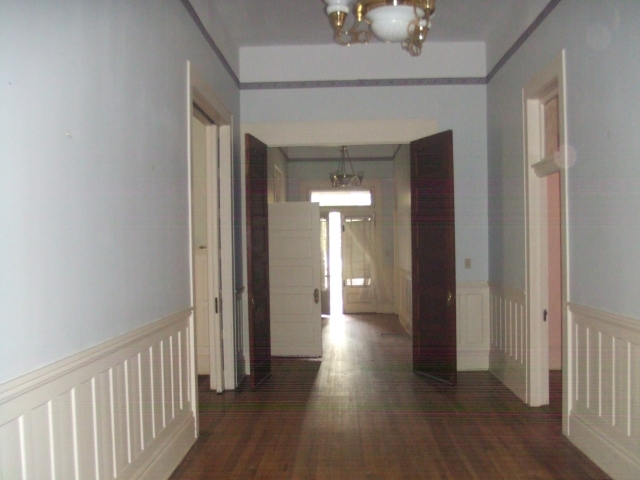
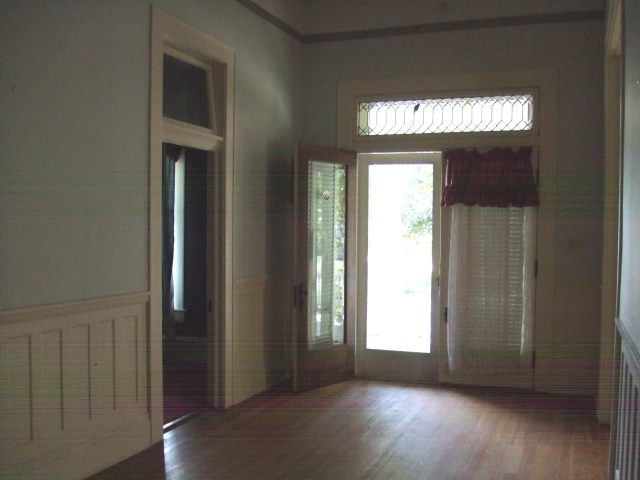
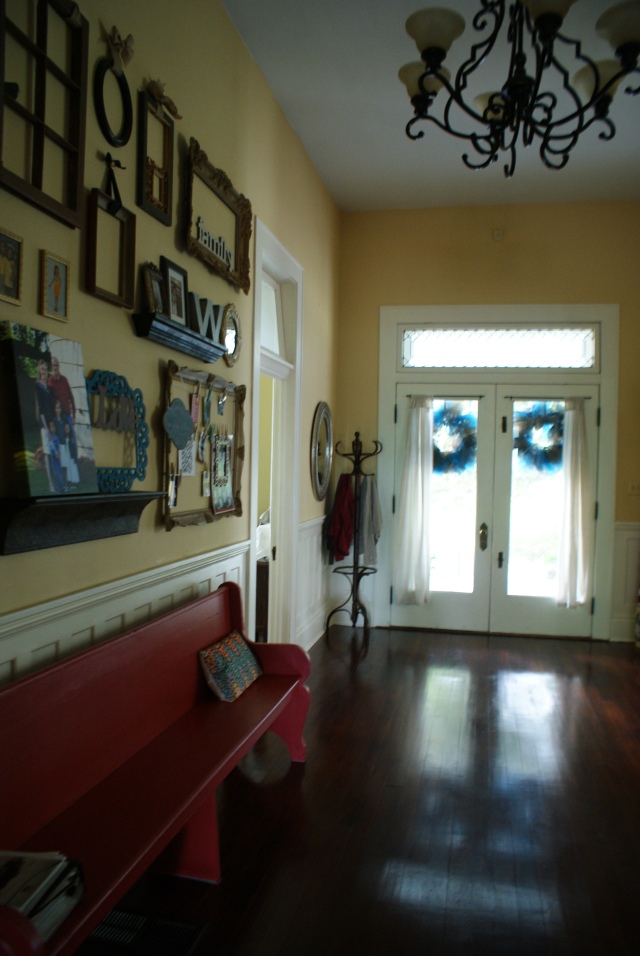
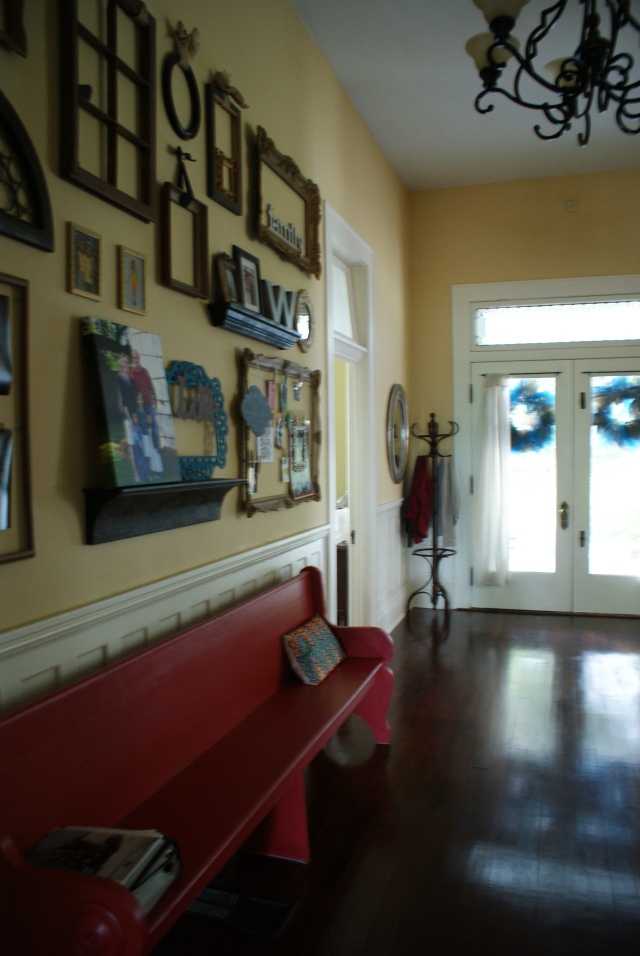
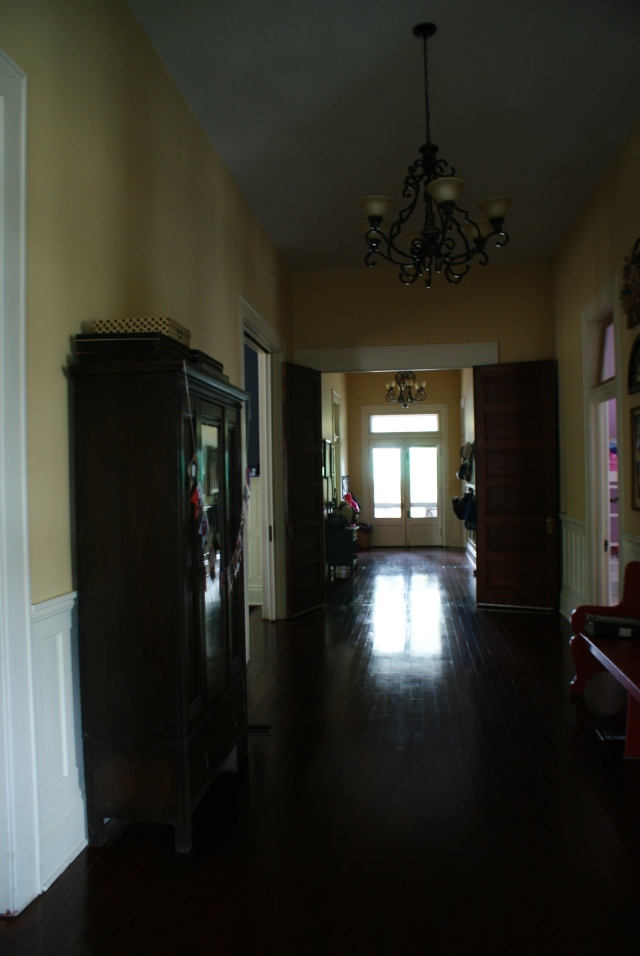
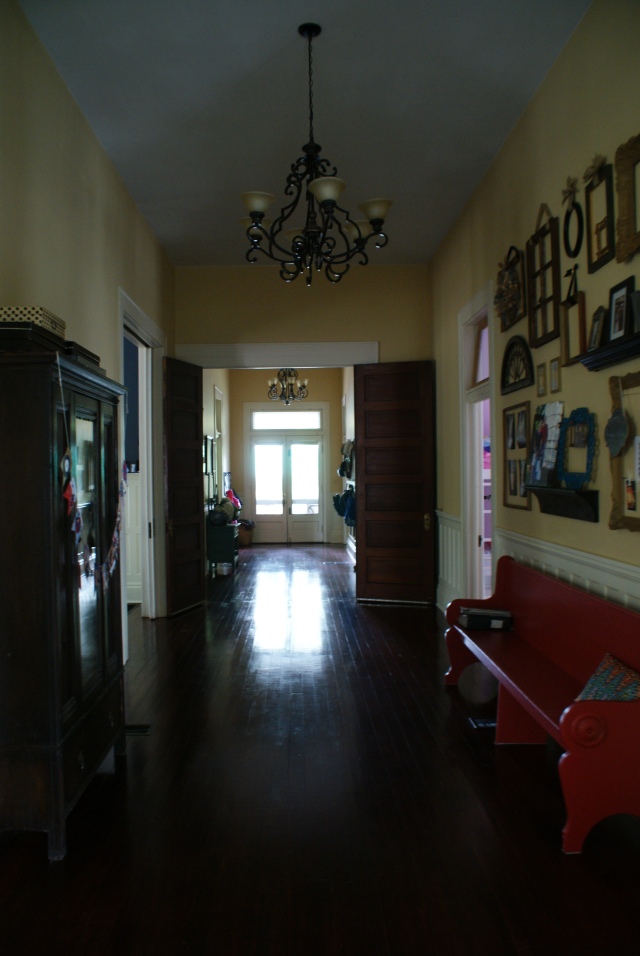
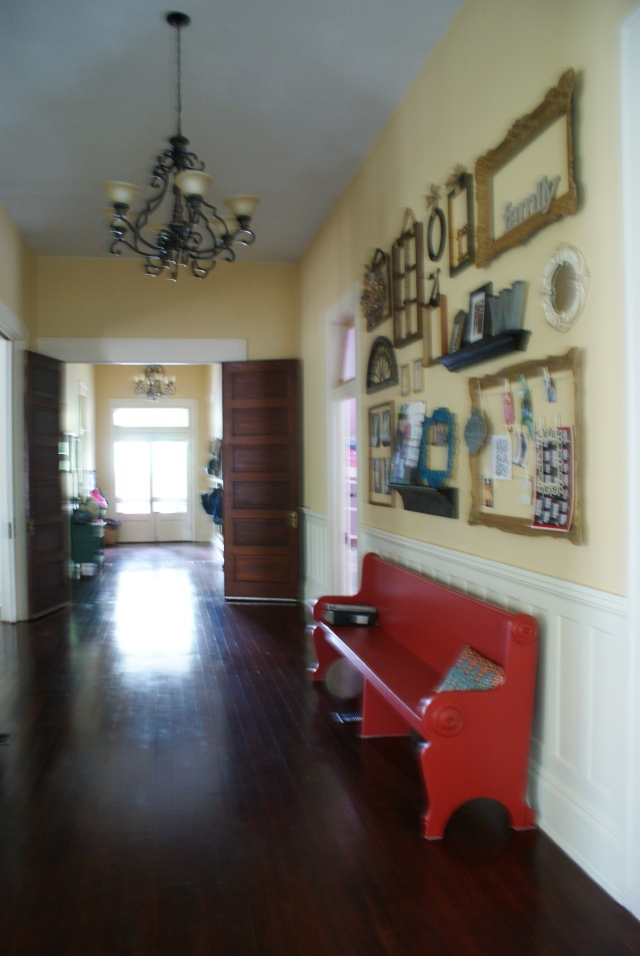
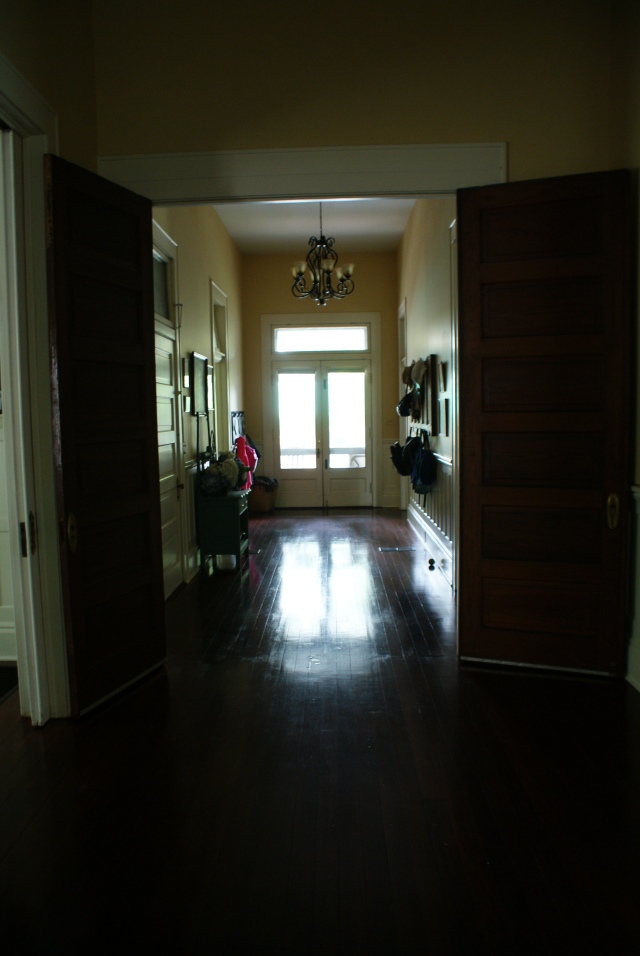
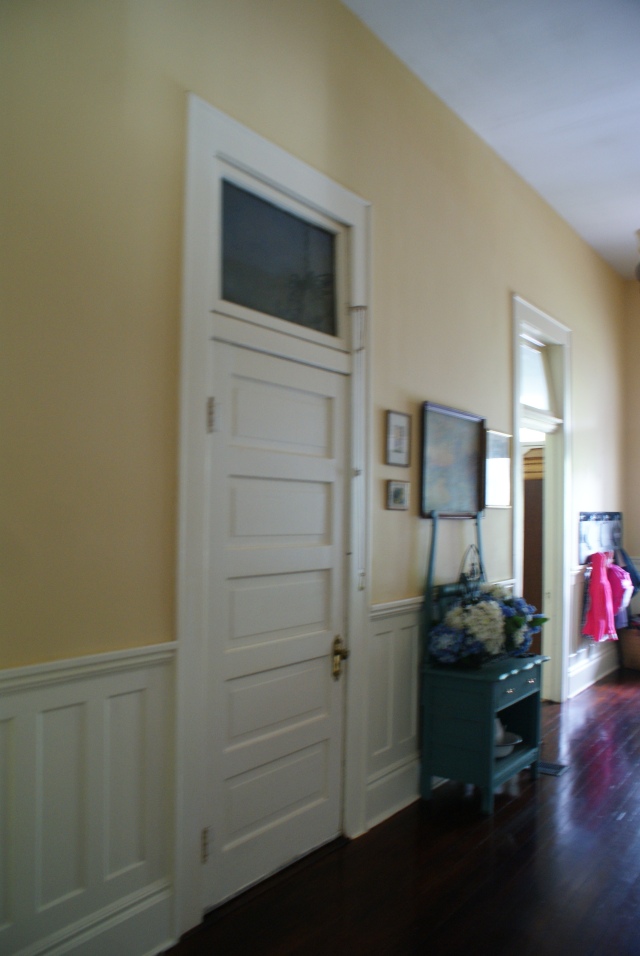
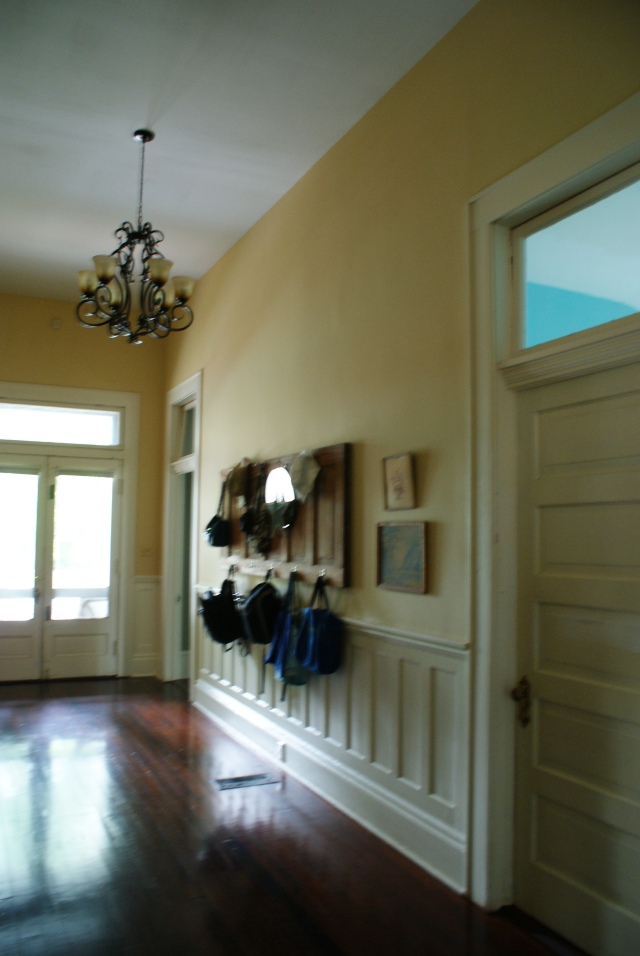
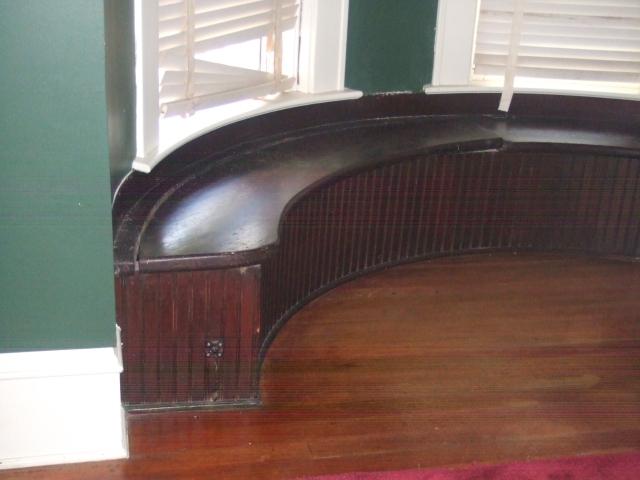
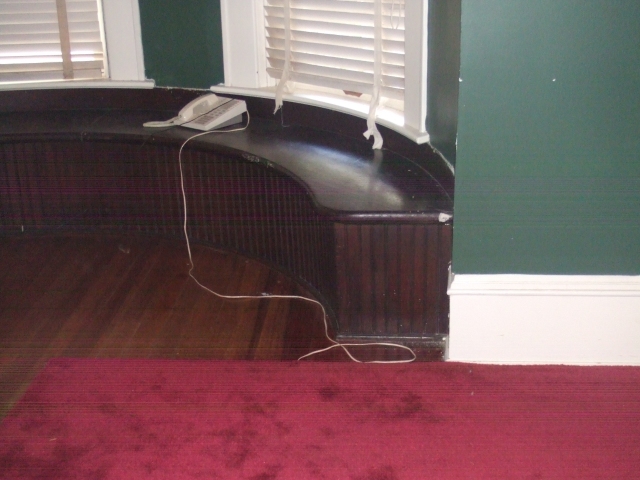
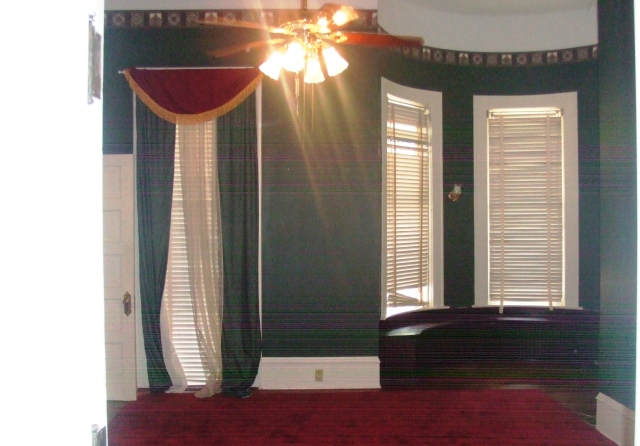
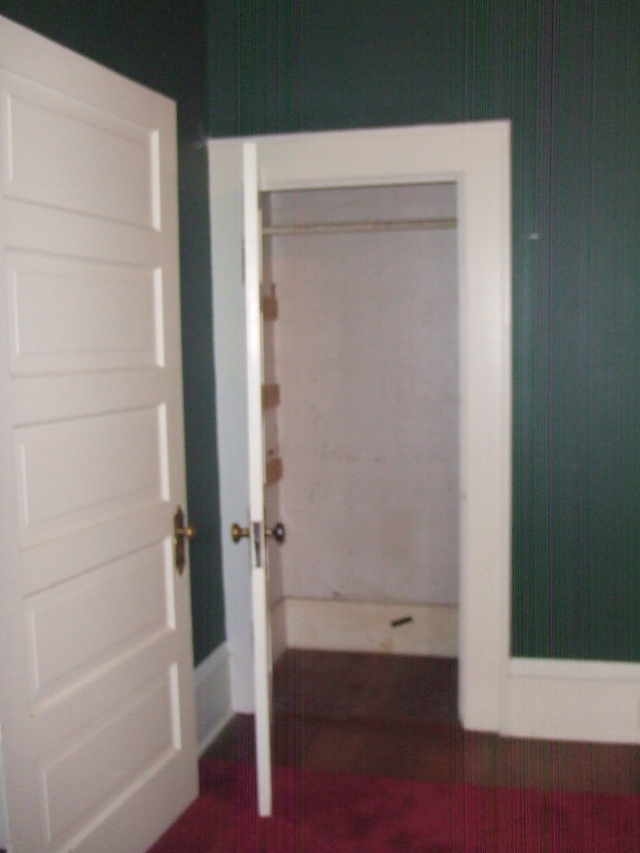
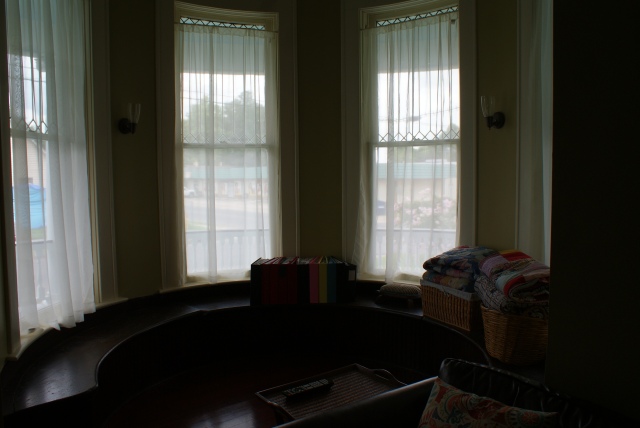
Here are some realtor walk through pictures of the hall, what it looked like through the years, then the final pictures after we refinished the floor and put up the interest wall.
")
")
PICTURES OVER THE YEARS


REFINISHED THE FLOORS, NEW ART, HOW IT LOOKS PRESENTLY:
SONY DSC
SONY DSC

SONY DSC
SONY DSC
SONY DSC
SONY DSC
SONY DSC
SONY DSC
SONY DSC
Here are a few before and after of the study. Here is the story of how we stained the floors. The first pictures are of the realtor walk through almost 10 years ago. Then there are pictures after I painted beige and left it like that for a while. It was kind of the dumping grounds of the house. Every odd piece of furniture and stack of tile got stored there, then we refinished the floors and added a bathroom in late 2012, early 2013. The last pictures are of the room currently.
REALTOR WALK THROUGH 2006

THE DUMPING GROUNDS FOR A WHILE


FRAMING UP A BATHROOM, CREATING AN INTEREST WALL, AND CHANGING THE ROOM ENTIRELY


AFTER
SONY DSC
SONY DSC
SONY DSC

SONY DSC

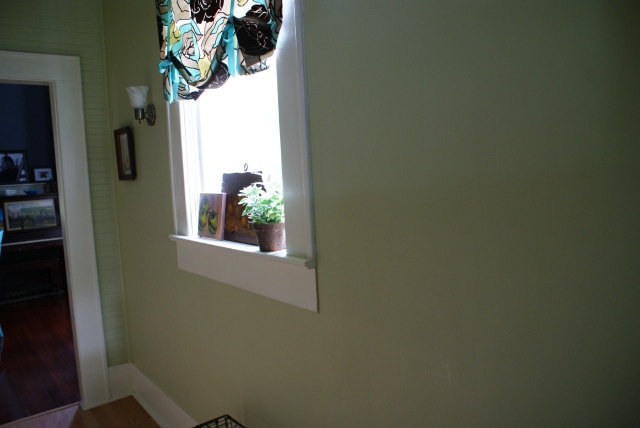
To continue the before and after series, here are the realtor walk through pictures from almost 10 years ago, what it looked like for several years, then when the floors were refinished about 2 years ago. Enjoy!
REALTOR WALK THROUGH


TAKING DOWN WALLPAPER, PAINTING.


AFTER/PRESENTLY:

SONY DSC
SONY DSC
SONY DSC
SONY DSC
SONY DSC
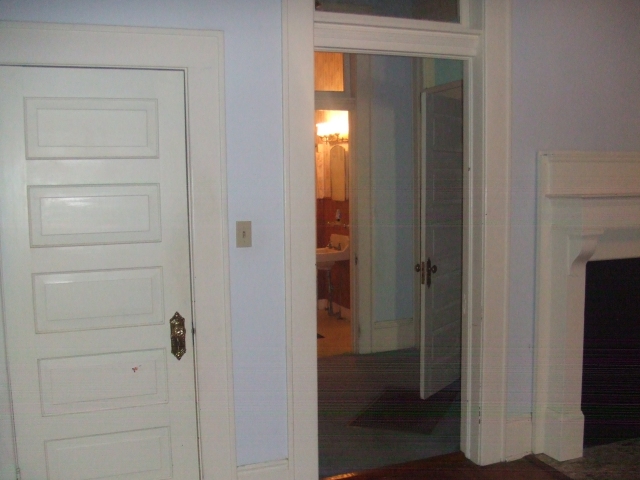
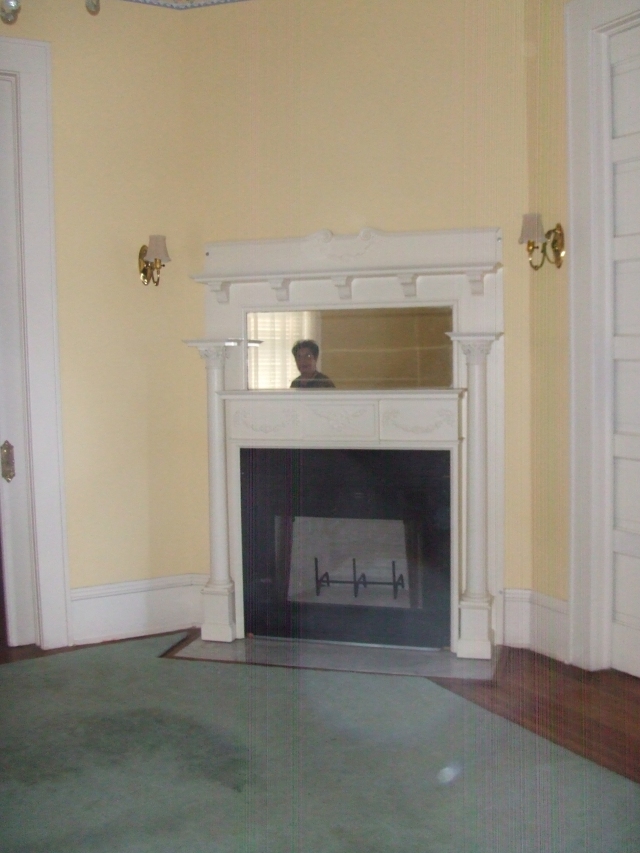
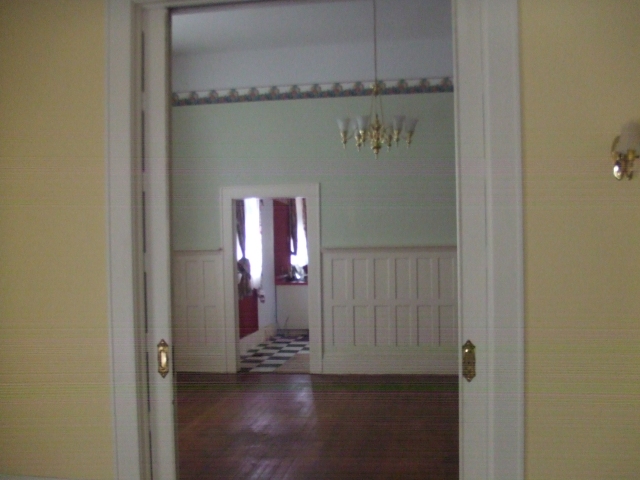
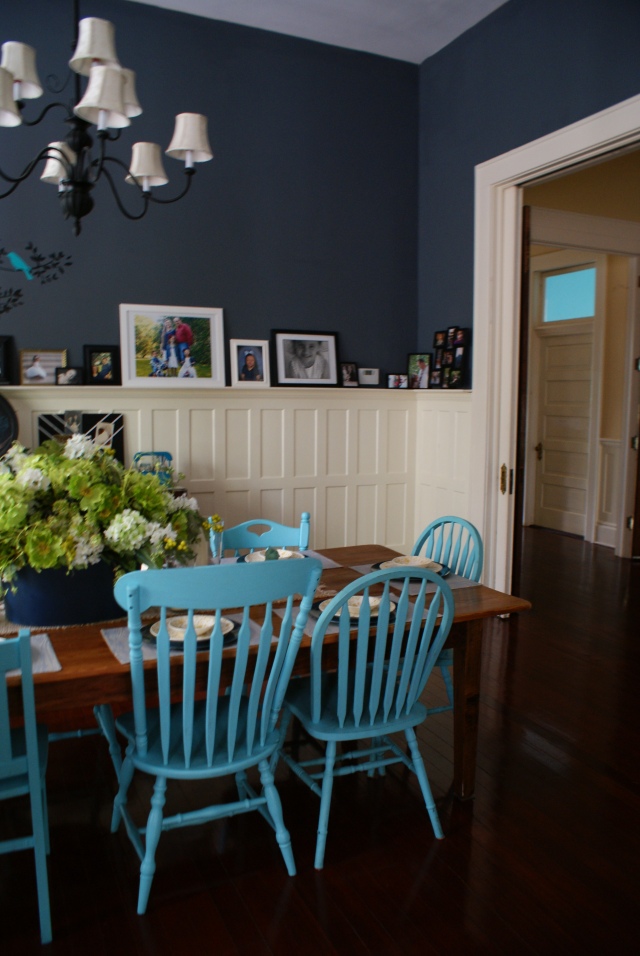
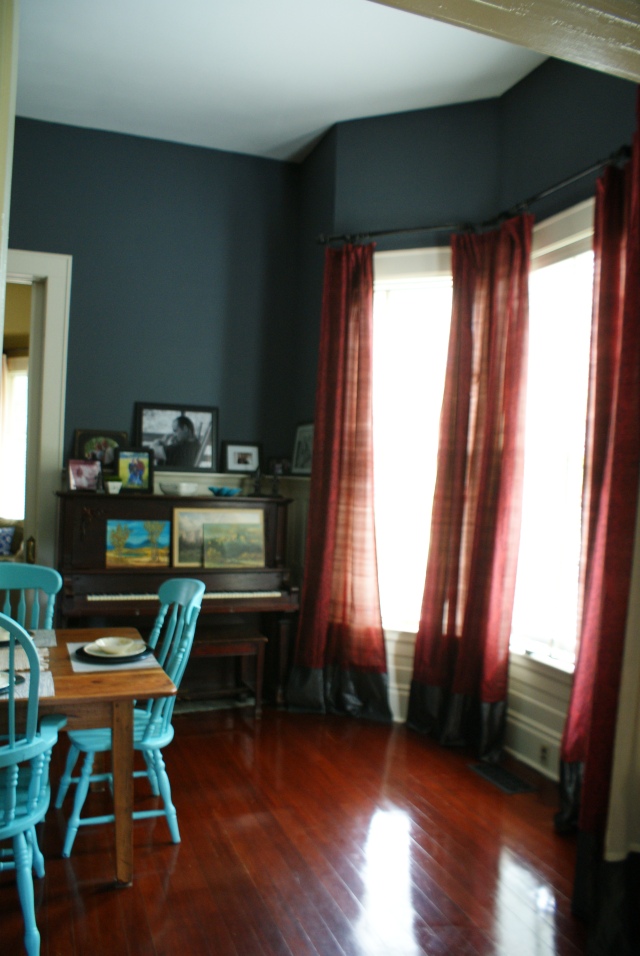
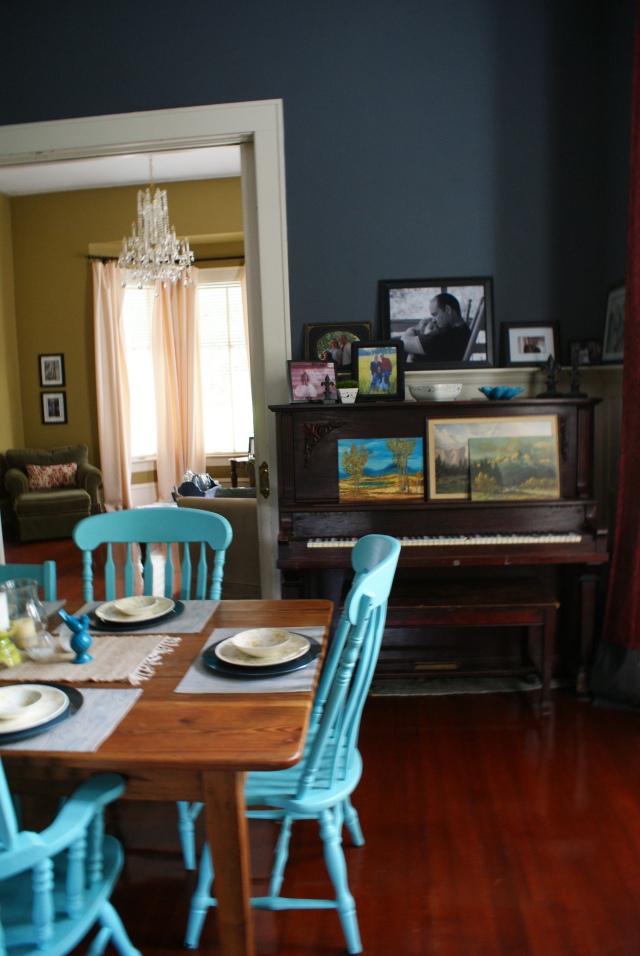
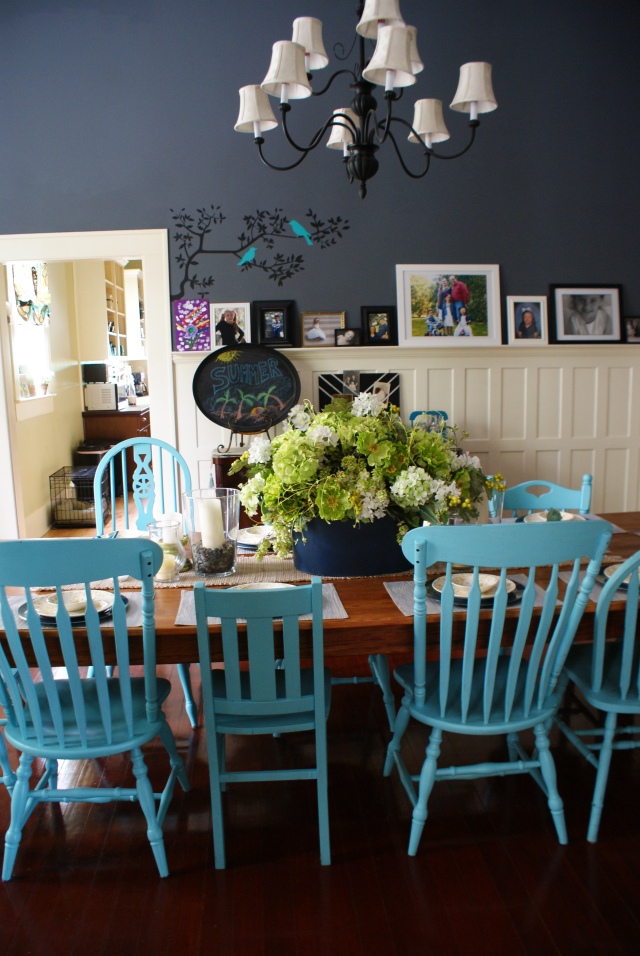
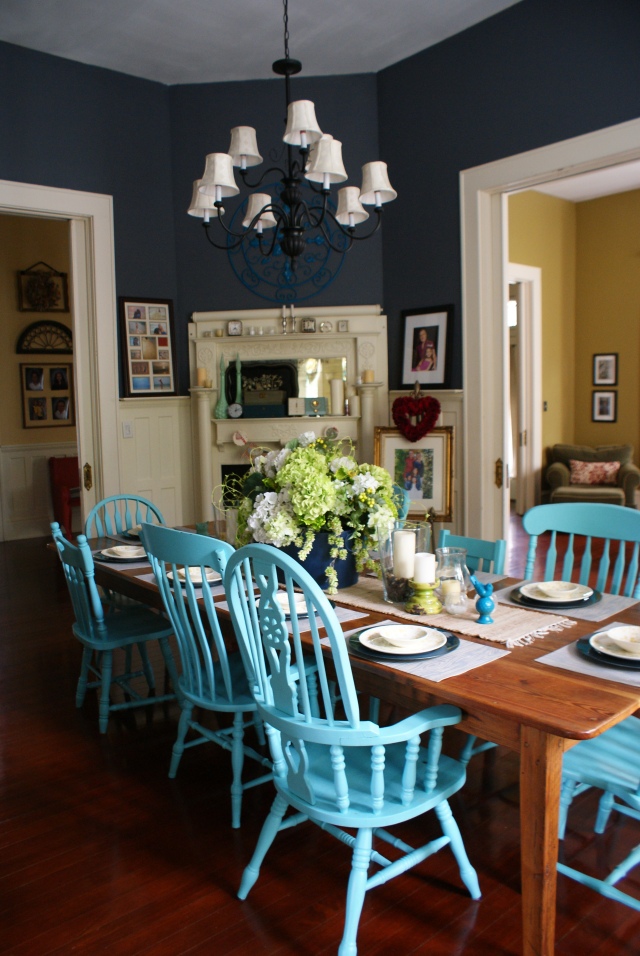
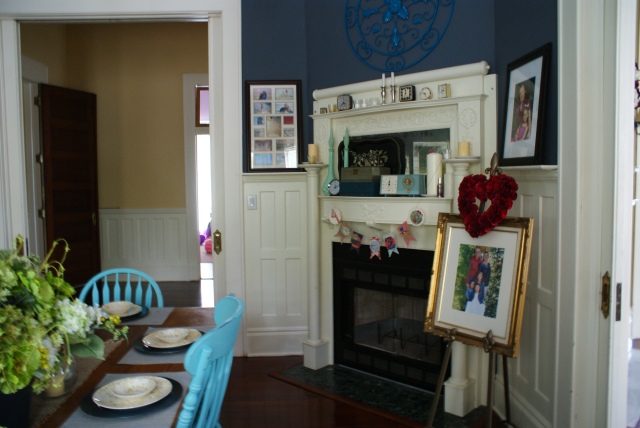
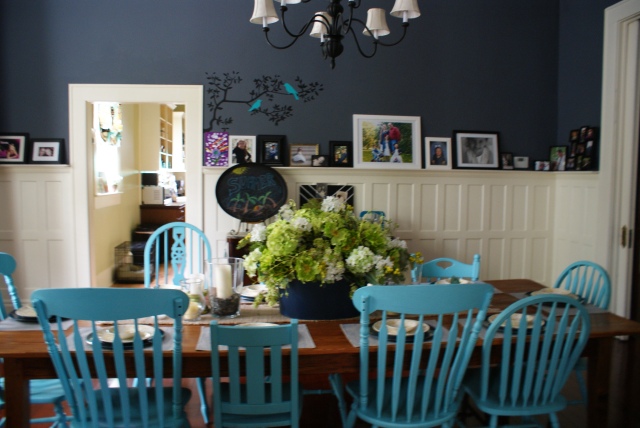
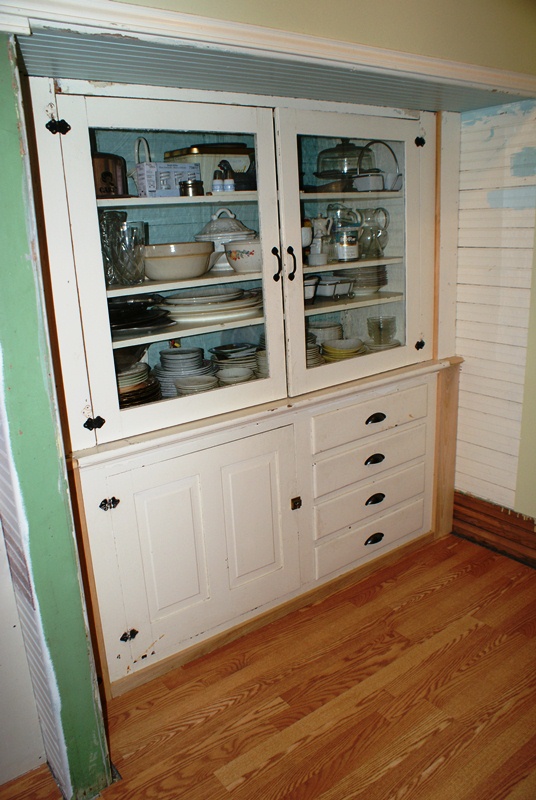
Here is the next room. The dining room. It has a pass through from the kitchen to the dining room. It has the original butler pantry cabinet that we restored back into its original spot. There was evidence of it being closed off where you had to pass through a door from the kitchen into the butler’s pantry. There was a sink and the cabinet, and then you also had to pass through another door to enter the dining room. Now, it is open.
Realtor walk through pics:
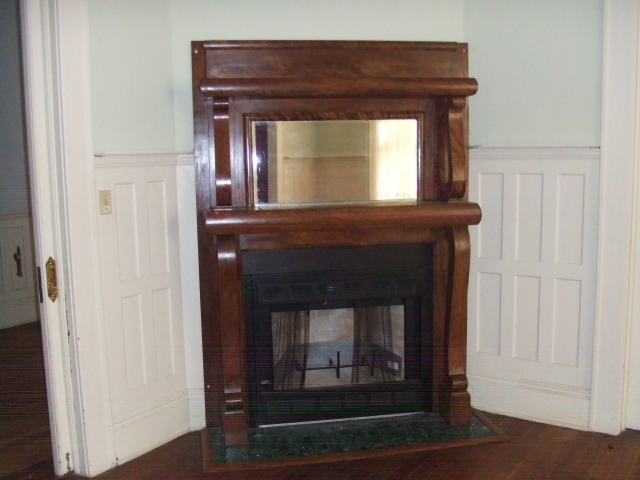

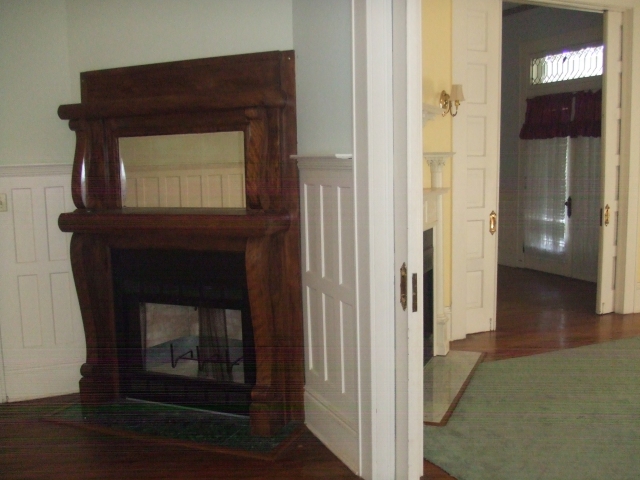

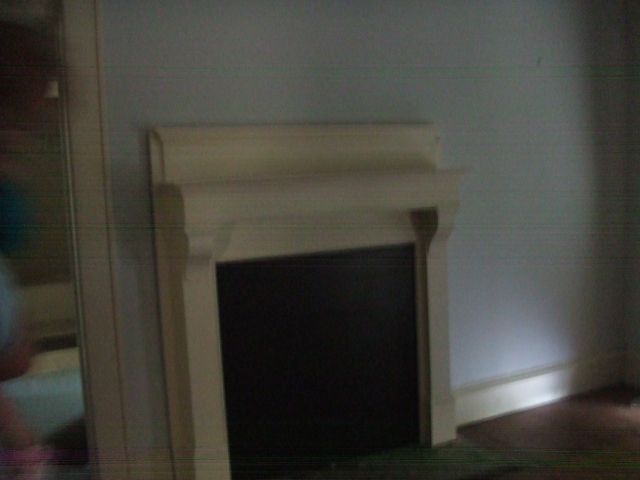
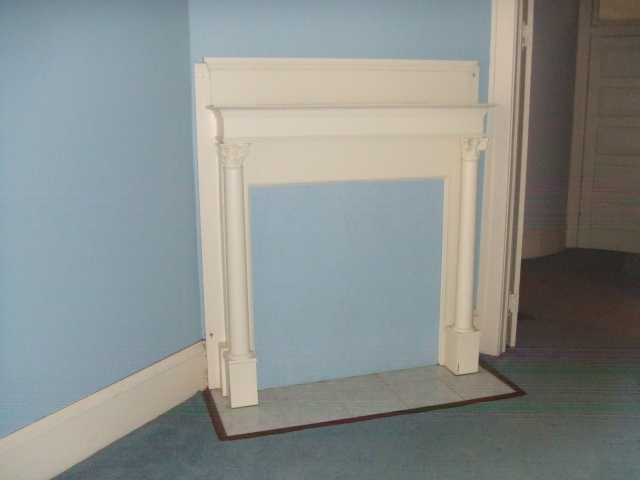
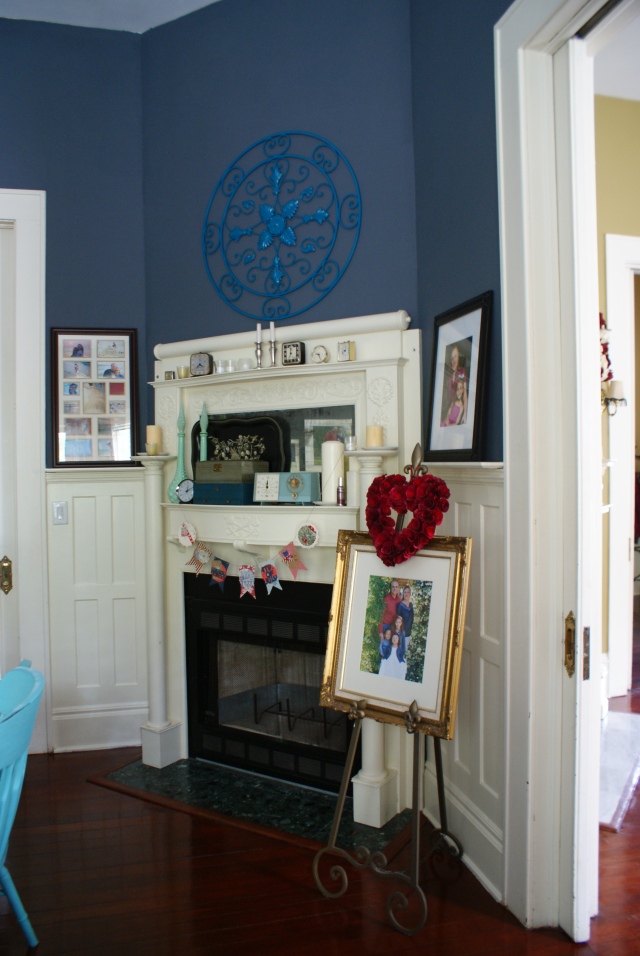
I didn’t realize the importance of taking good pictures back then. The dining room was mint green with a border. The fireplace was odd. I never thought it fit in a formal room. We eventually switched it with another one. We put this one in Alex’s room and moved the more ornate one into the dining room.
Here are some pictures of how it was for a while in the interim until we refinished the floors and completed all the exterior work. In between working on these rooms, we also redid the two other houses on either side of us. Each of them came up for sale and we bought them for a good price. We took a break on our house and spent 9 months each on those two houses, then coming back to ours. For pictures of those remodel you can click on the tag 94 Bungalow and 1808 Bungalow.


The floor was really bad and we had it covered with a rug for most of our years here. Then, I refinished all the floors and it came out beautiful!
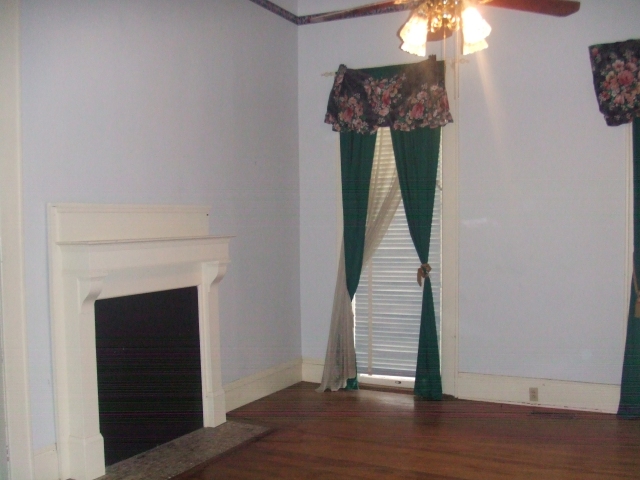
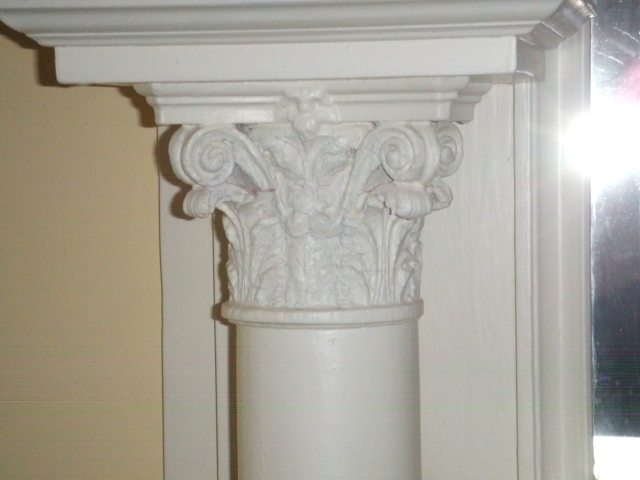
Here are the after pictures. This room was easy. We painted. We caulked the wainscoting and repainted it. We refinished the floors and painted a new color. Then switched out the fireplace for another one in the house:

SONY DSC
SONY DSC
SONY DSC
SONY DSC
SONY DSC
SONY DSC

SONY DSC
SONY DSC
SONY DSC
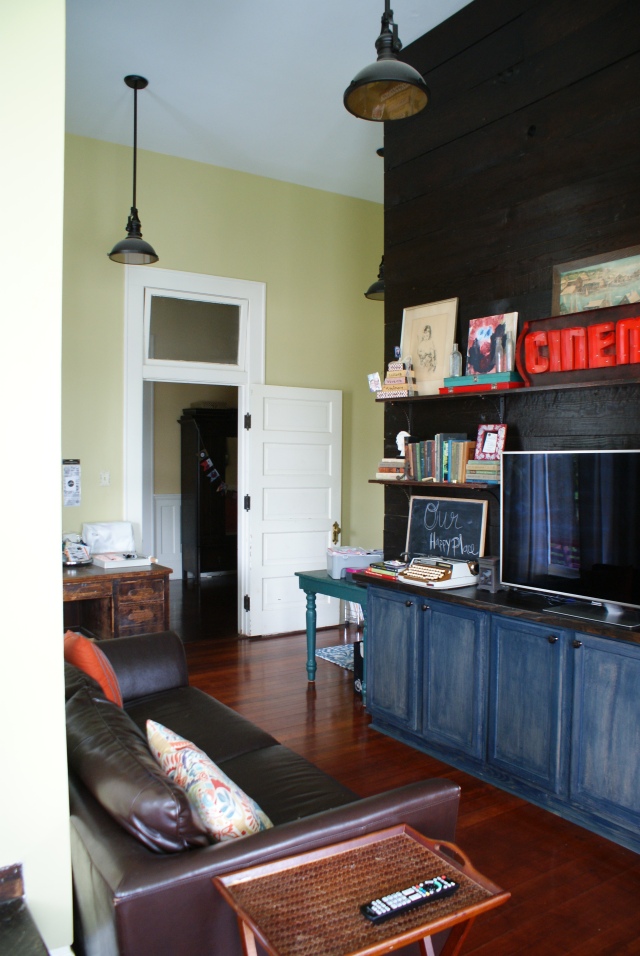
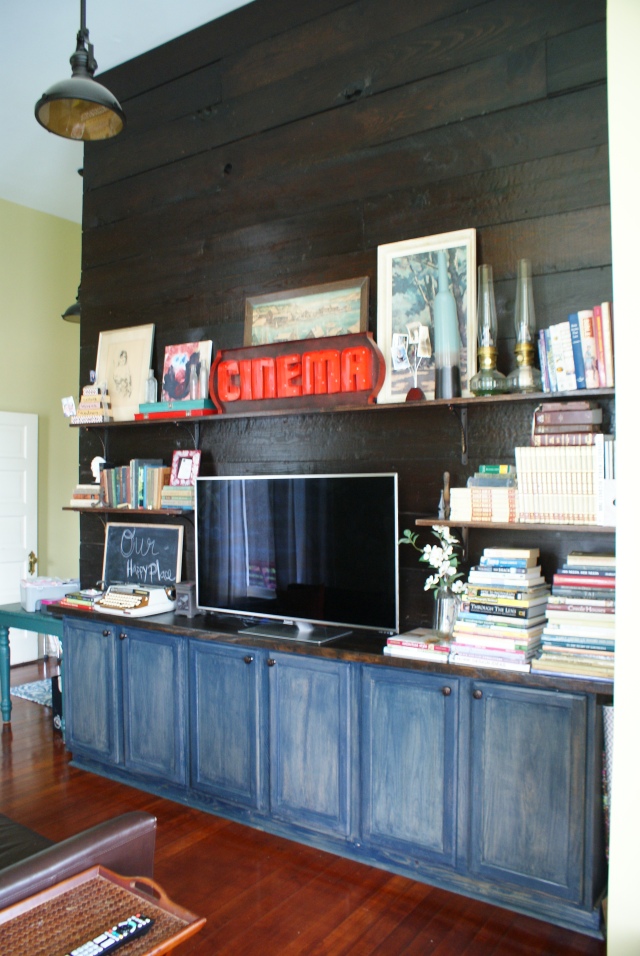
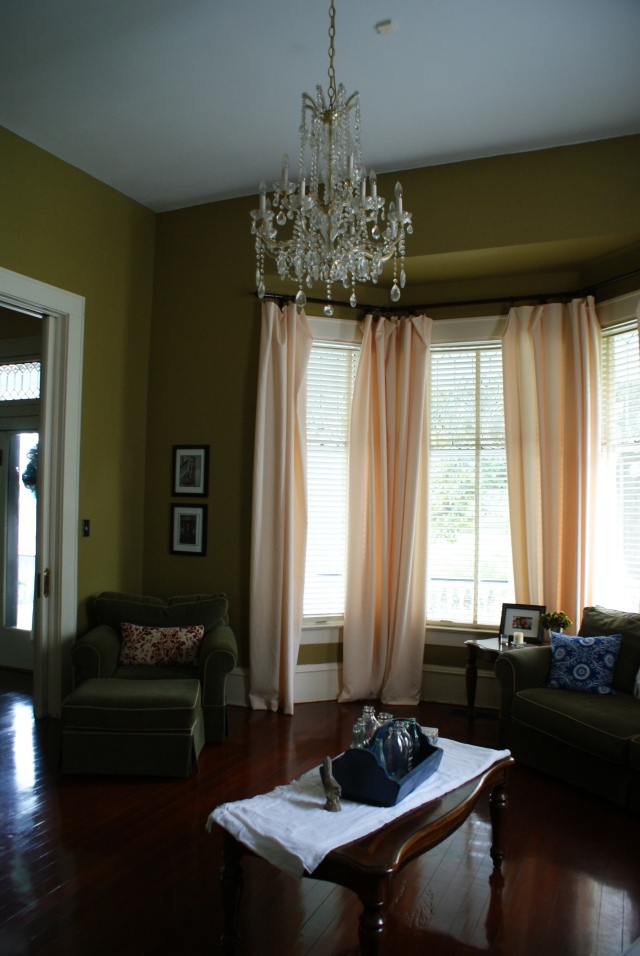
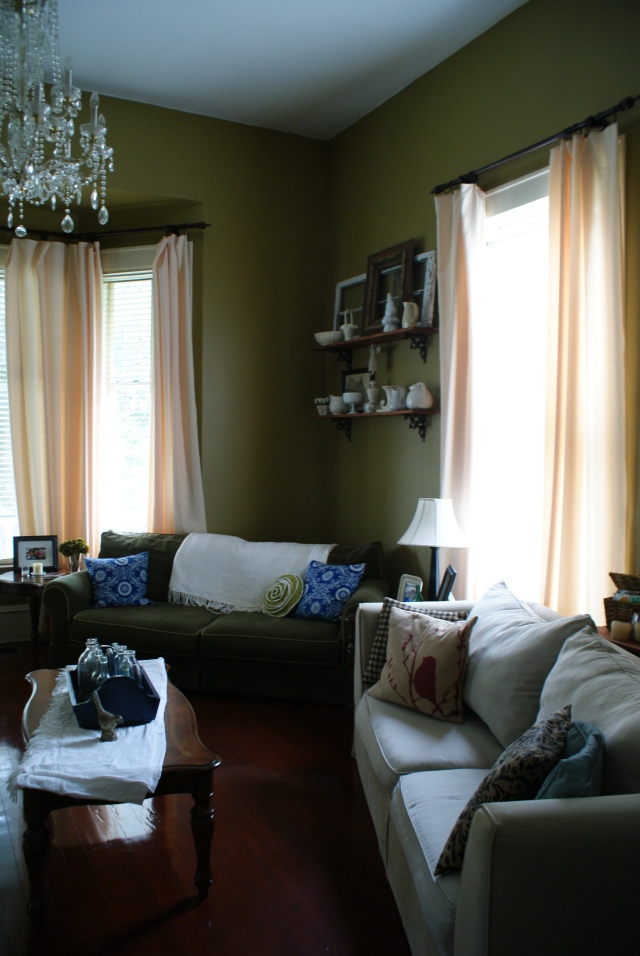
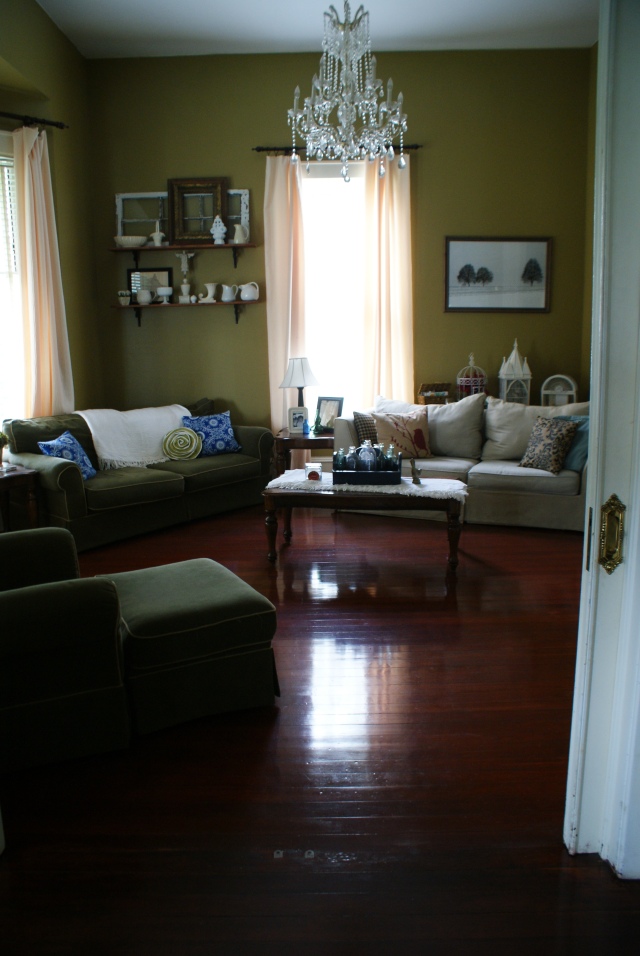
Thanks for looking! The next room will be the living room.
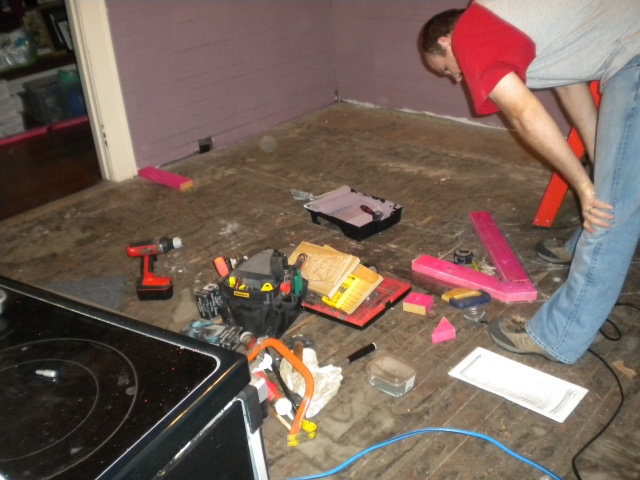
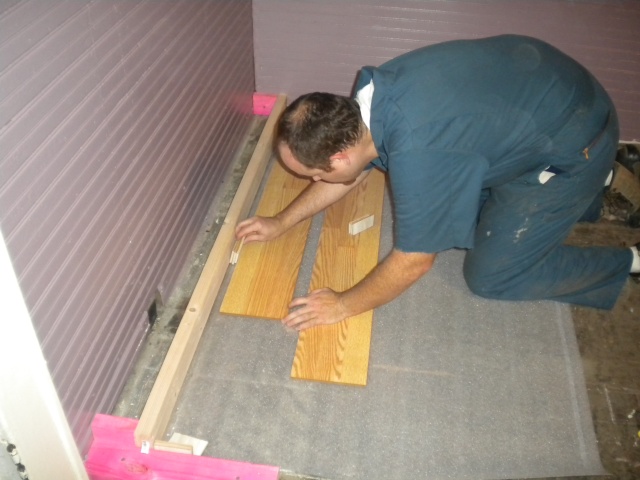
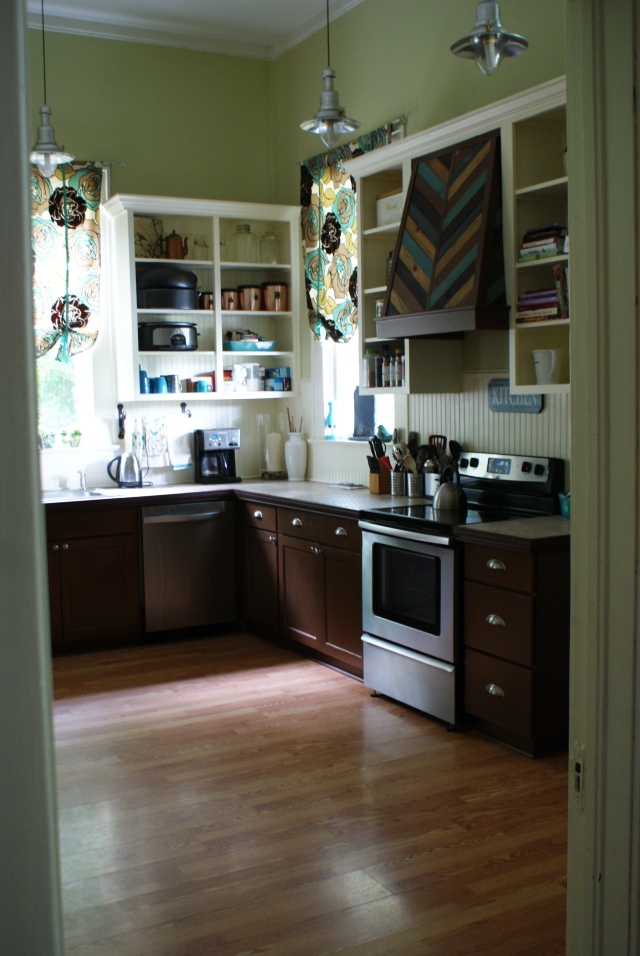
This has been long overdue. I am now going to post the before pictures of the house when we first walked through it in 2006 prior to purchasing and the pictures as it looks presently. I thought I would start with the kitchen as it has undergone the biggest transformation.
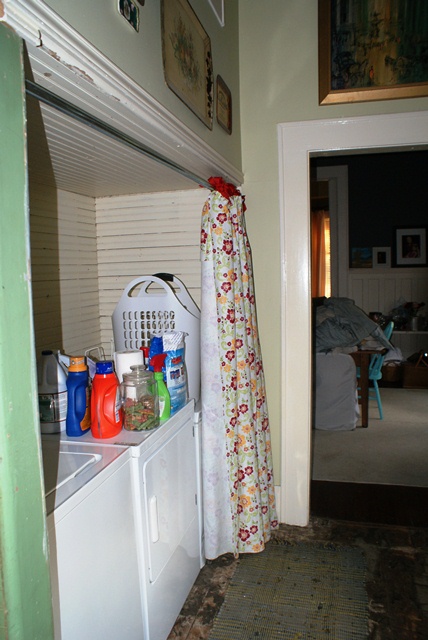
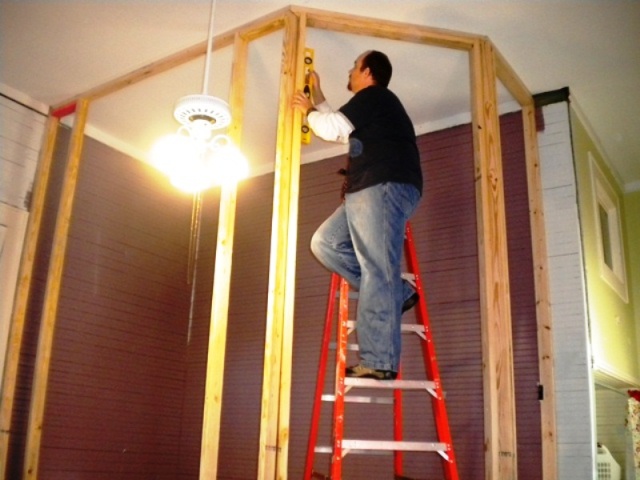
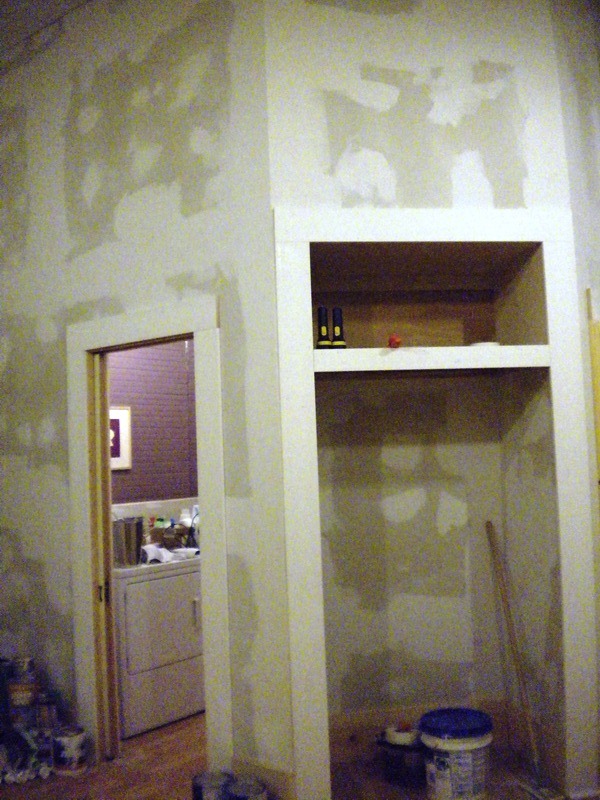
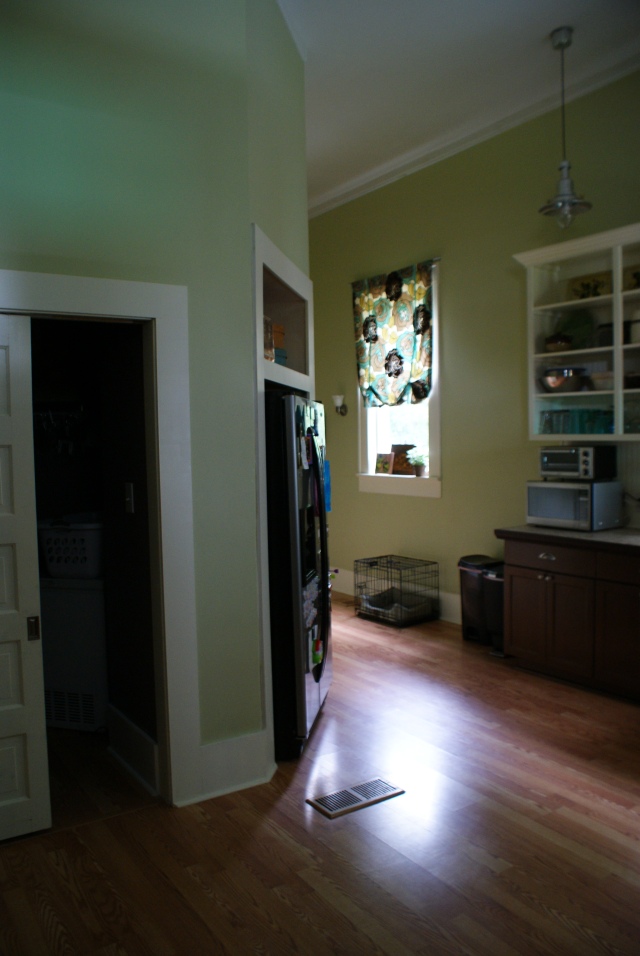
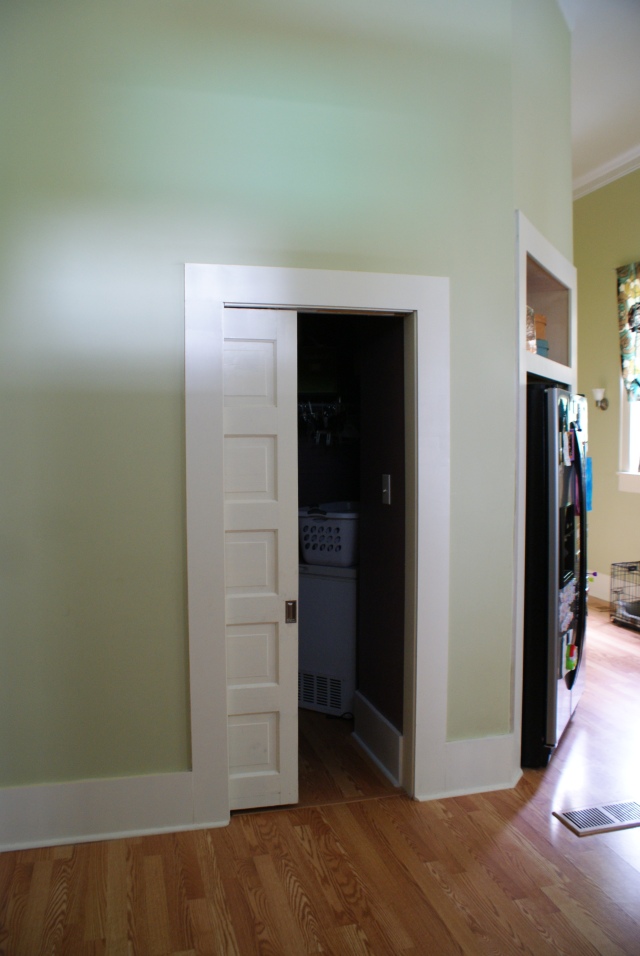
When we first bought the house, the kitchen had carpet in it. We took up the carpeting and the tile underneath it was really not in great shape, but it was better than carpet. So, it stayed black and white tile for a long time. Eventually, we moved the butler pantry back where it belonged and framed a wall up and added a laundry room. For more details and pictures regarding the entire process, click on the tag: kitchen.
Here are the before pictures. We took down the fabric that stapled to the walls. I was able to wash the red acryllic paint off of the cabinets. And the kitchen largely stayed like this from 2006-2010 until we were able to complete renovate.

")
")
")
")
")


I sanded the laminate counter top, super primed it then painted it a stone fleck black. Here are some transitional pictures during that timeframe before the full remodel:


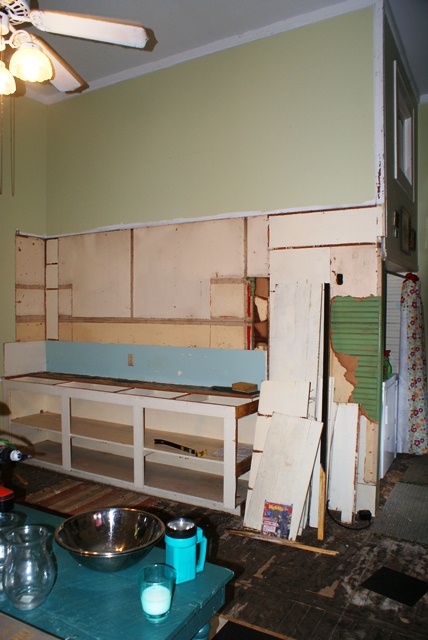
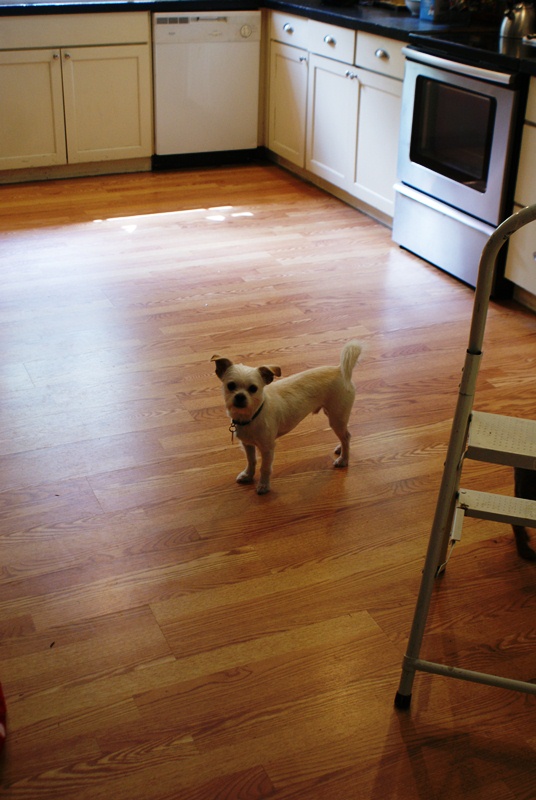
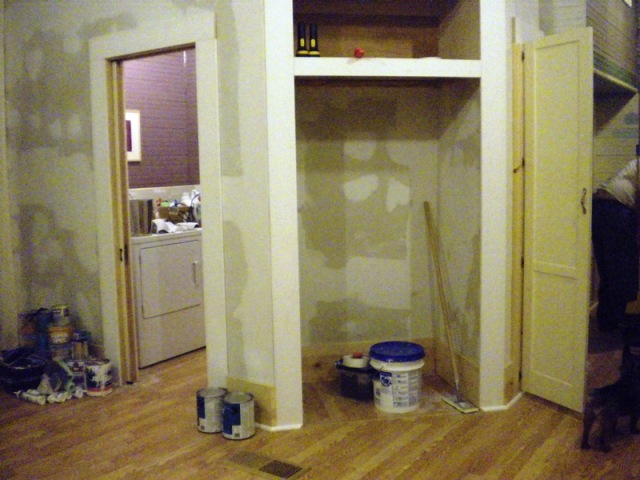
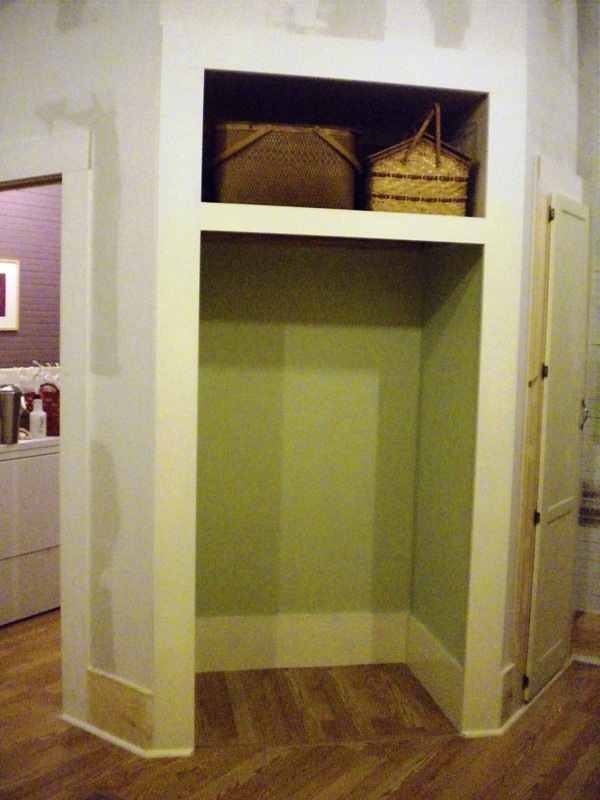
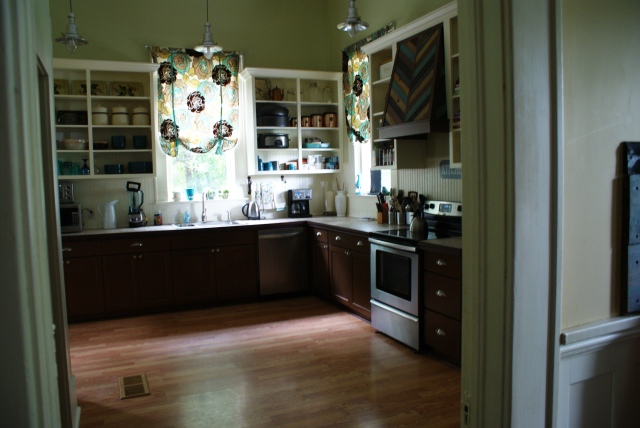
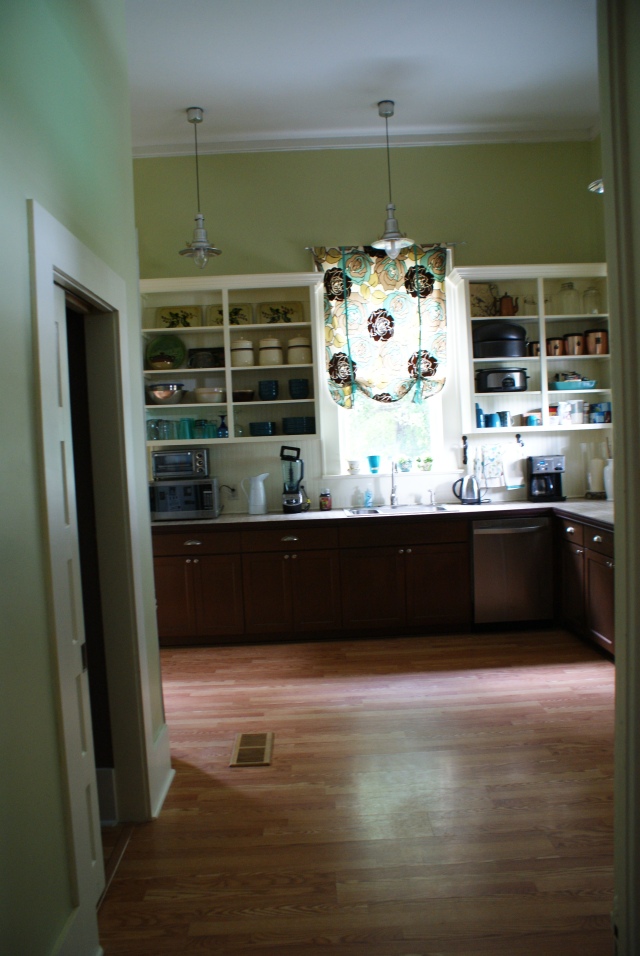
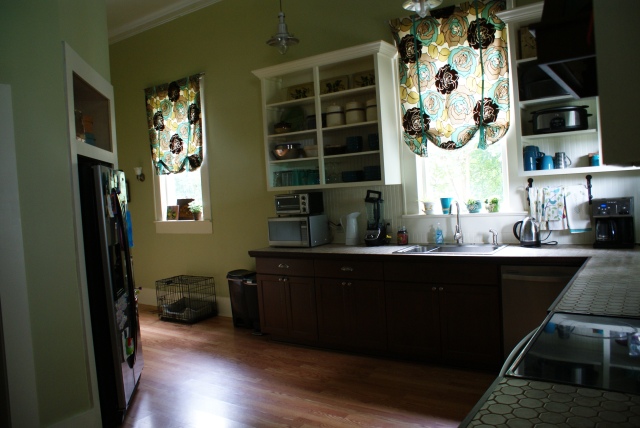
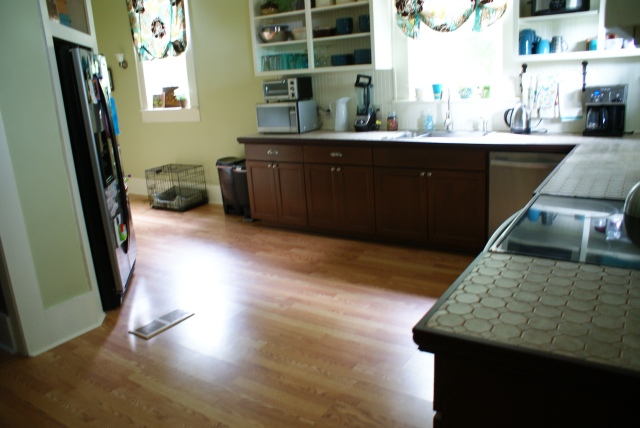
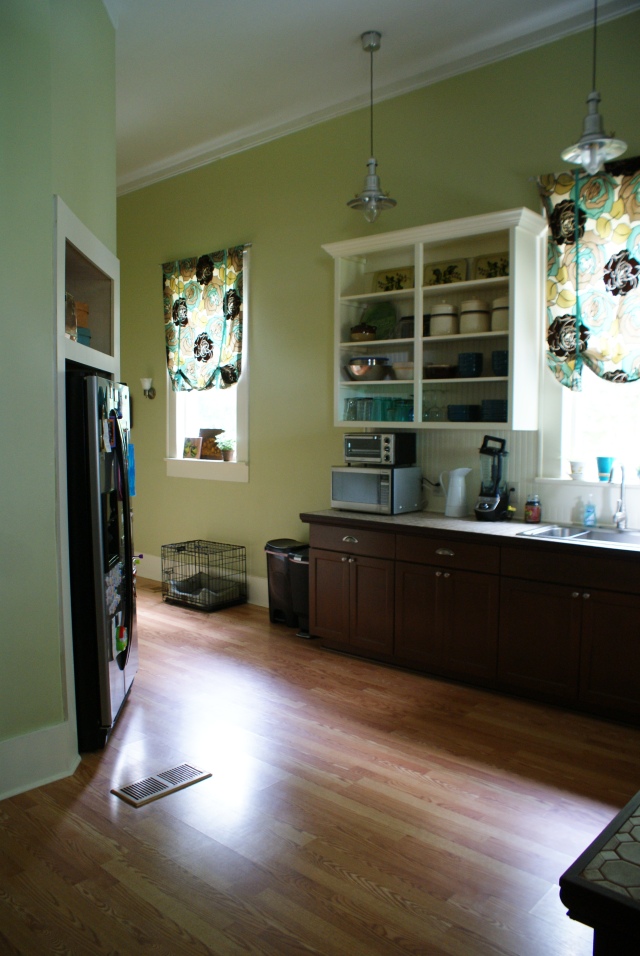
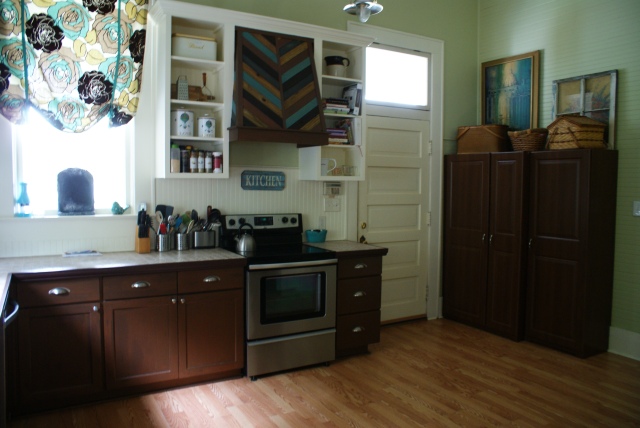
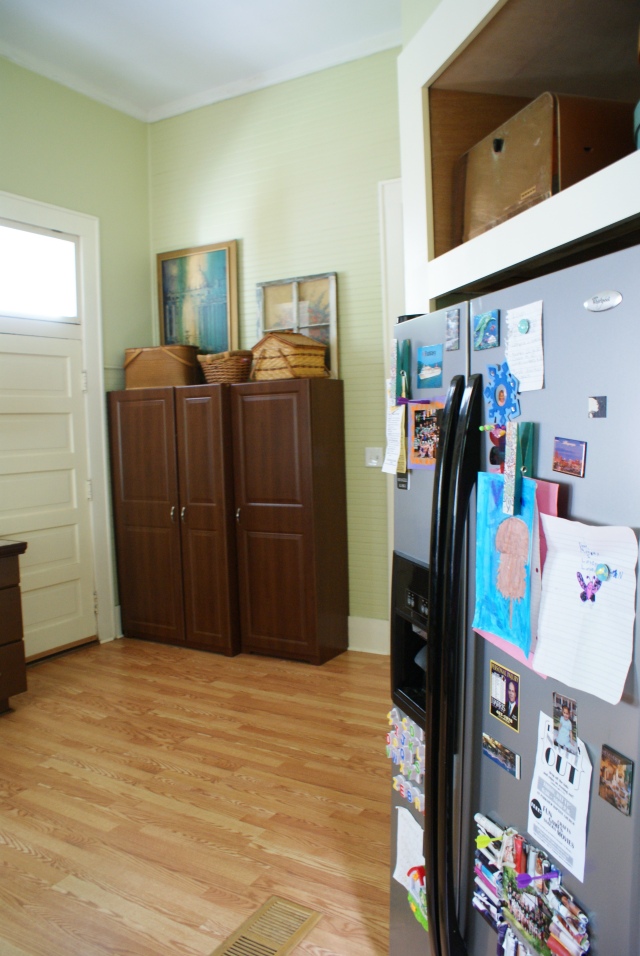
And…here are the final “after” pictures and how the kitchen presently looks. We built custom open shelving cabinets, painted the bottom cabinets, took down the wall of cabinets on the back wall. Pulled down the sheetrock and exposed the original beadboard, framed up a laundry room and moved the butler’s pantry that had been hacked out and set behind the door–back to its original home in between the kitchen and dining room. Here is the link to the full write up: Click Here.
The demo:


Ripping out the cabinets, Steven and Vivian taking the doors off

The washer and dryer are where the cabinet is supposed to be

Butler’s pantry/cabinet
Mostly gone
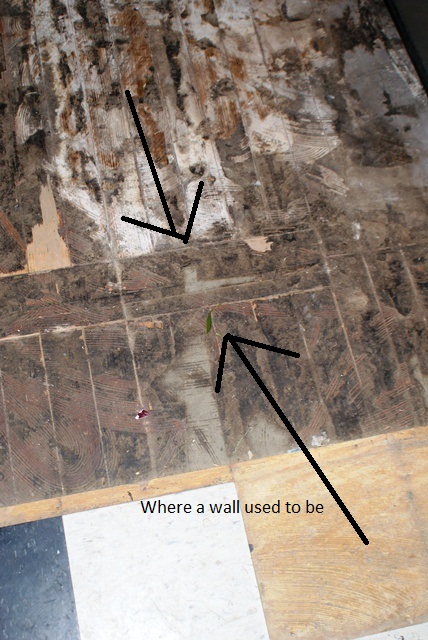
Where a wall used to be in the kitchen


Kitchen gutted

The same wall…cleaned and primed (Super duper KILZ!)

The framing going up!

Painted and the floor down

Where the butler pantry is supposed to be

Right before we moved it and put the floor down

moved the washer and dryer

installing the cabinet
Framing up the laundry room
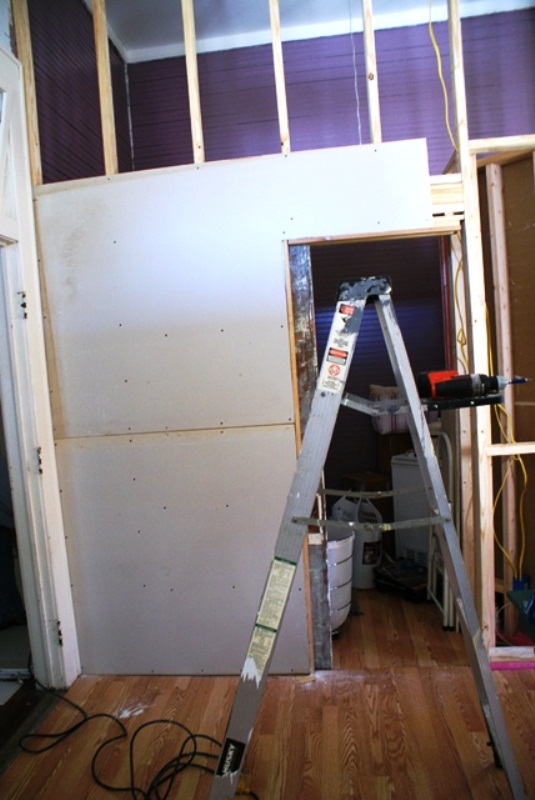
Sheetrocking laundry
The in between:


And here are the final pictures:


SONY DSC
SONY DSC
SONY DSC
SONY DSC
SONY DSC
SONY DSC
SONY DSC
SONY DSC
SONY DSC
SONY DSC

SONY DSC
SONY DSC
Here is a video I posted on Youtube right before our house was appraised in 2014. I took advantage of everything being picked up and nice and neat: https://youtu.be/avBTQc8bBIE
Hope you had fun! The next post will be up in a couple days of the next room. I will continue until all rooms are shown.
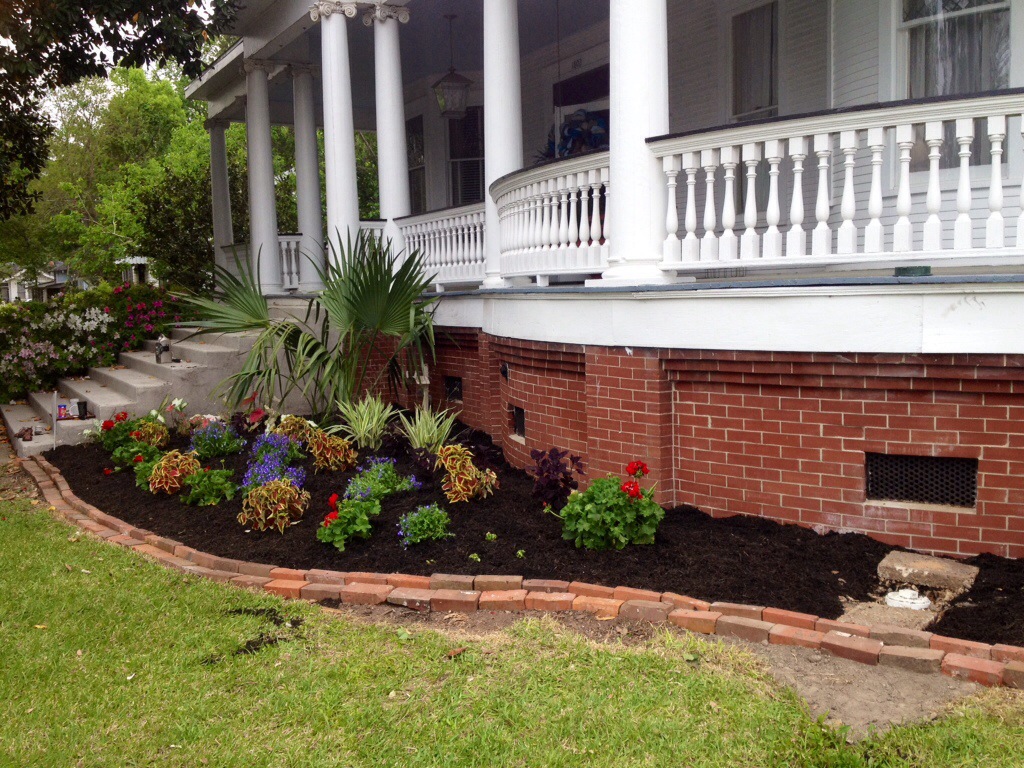
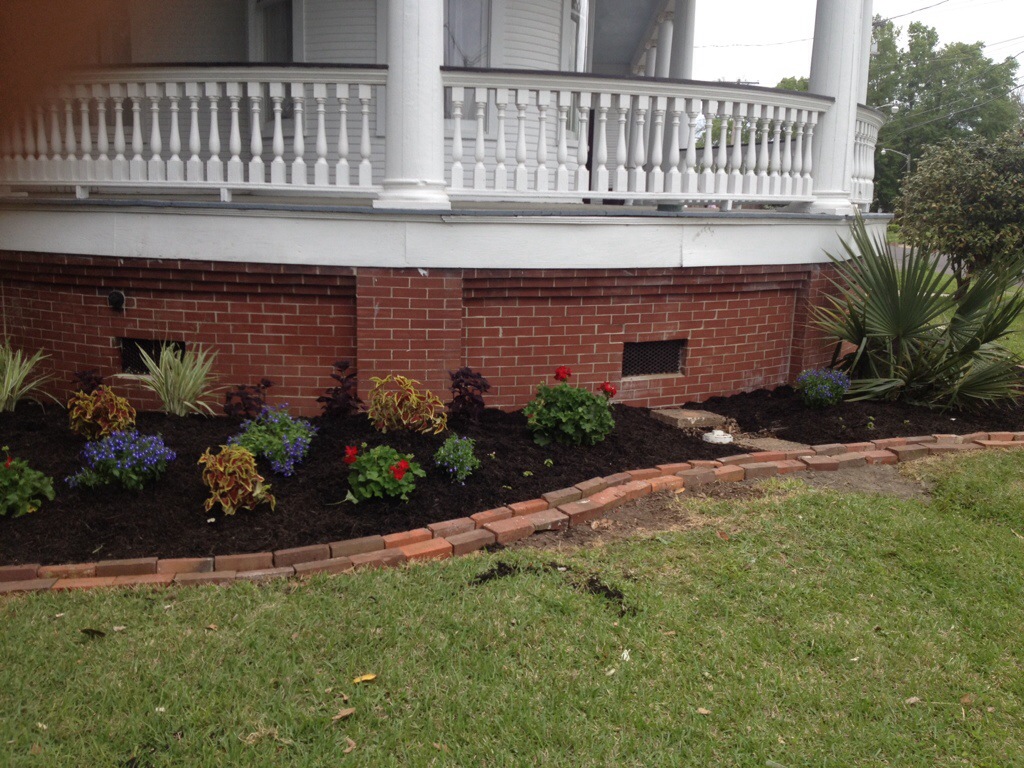
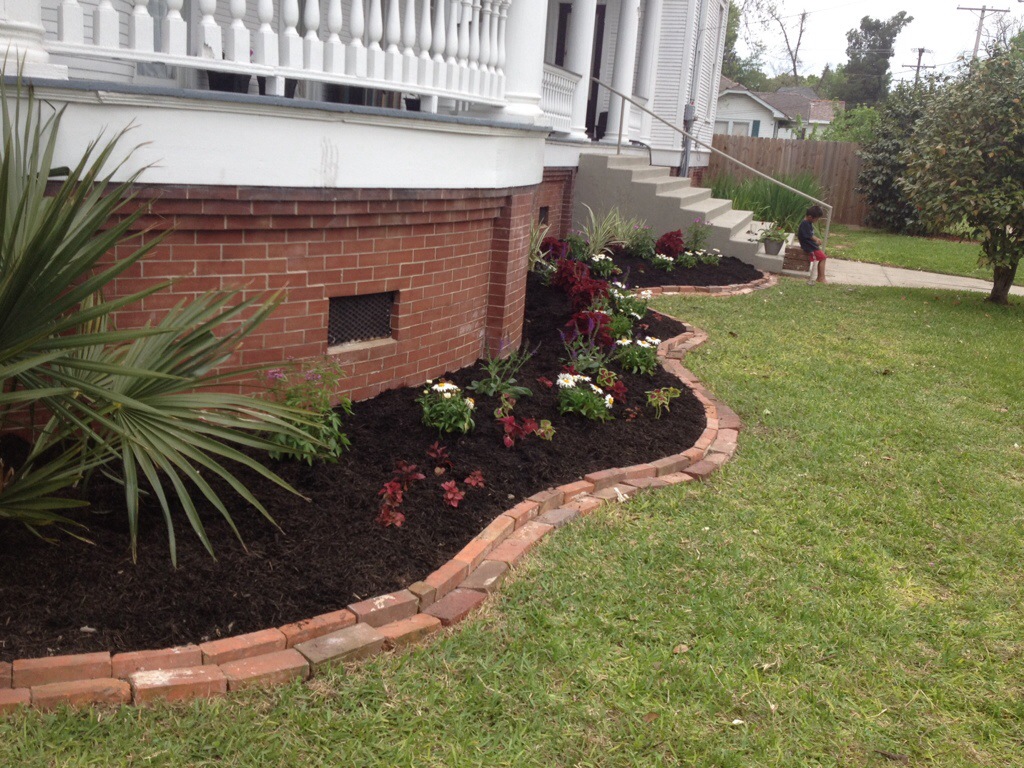
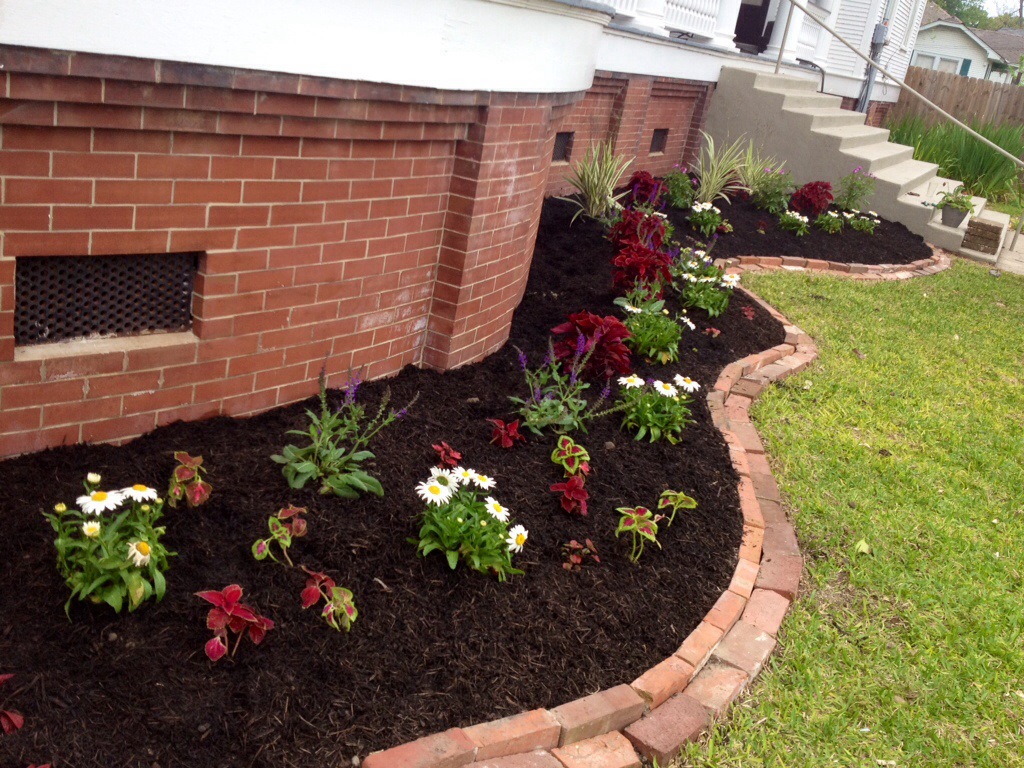
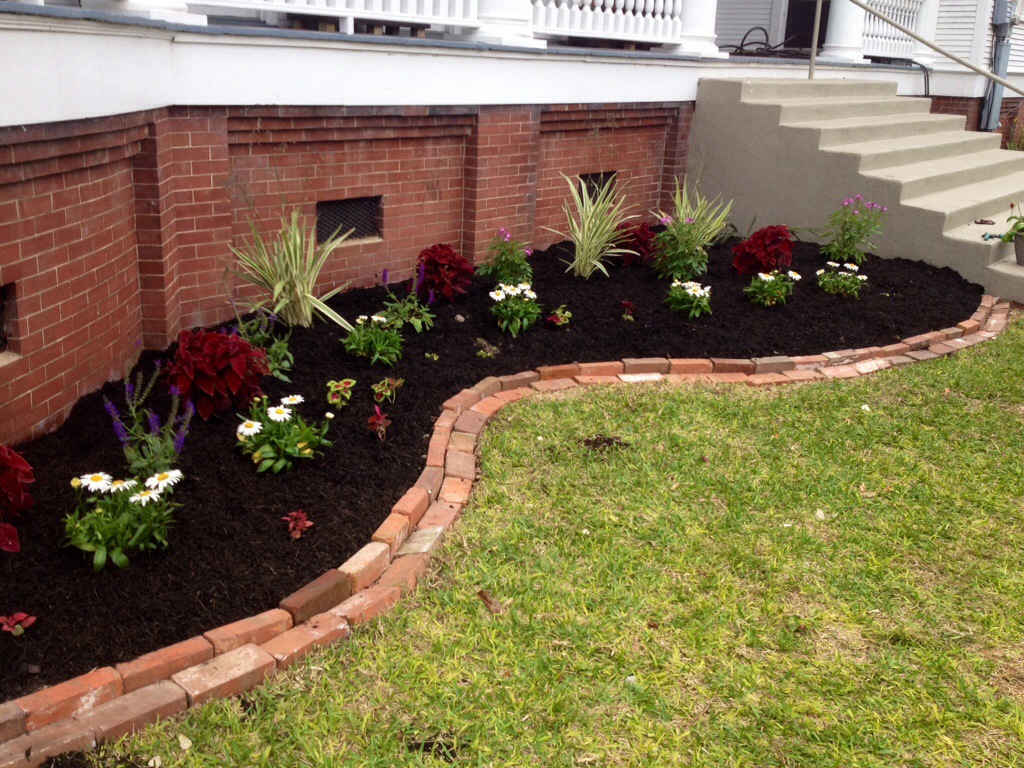
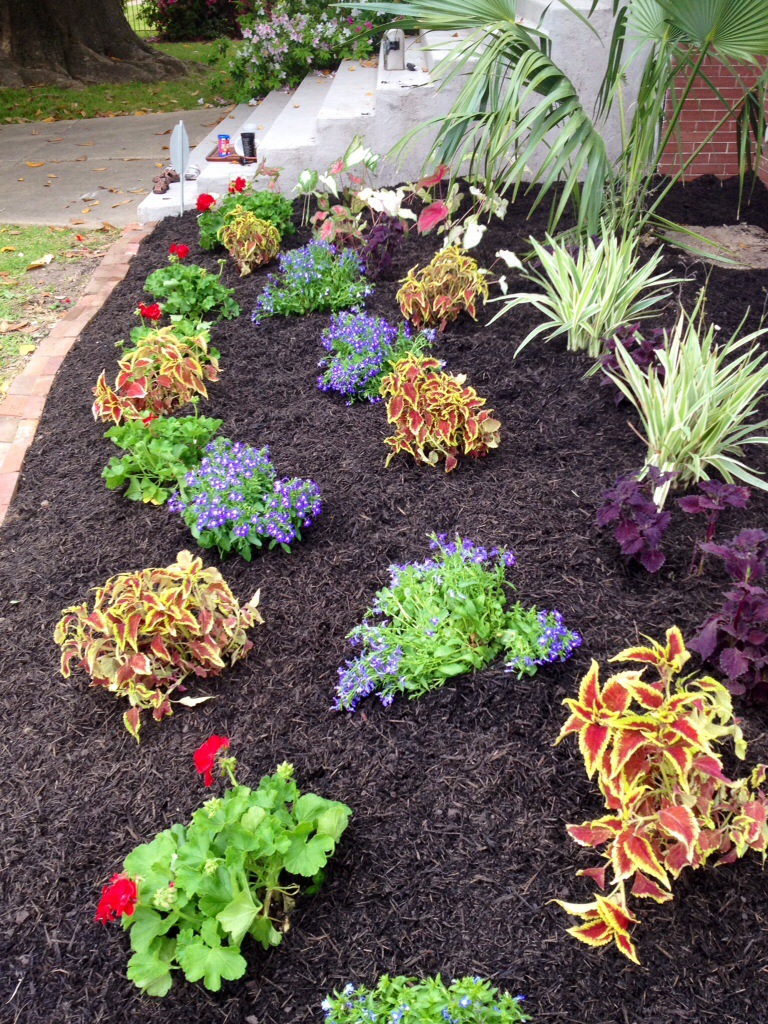
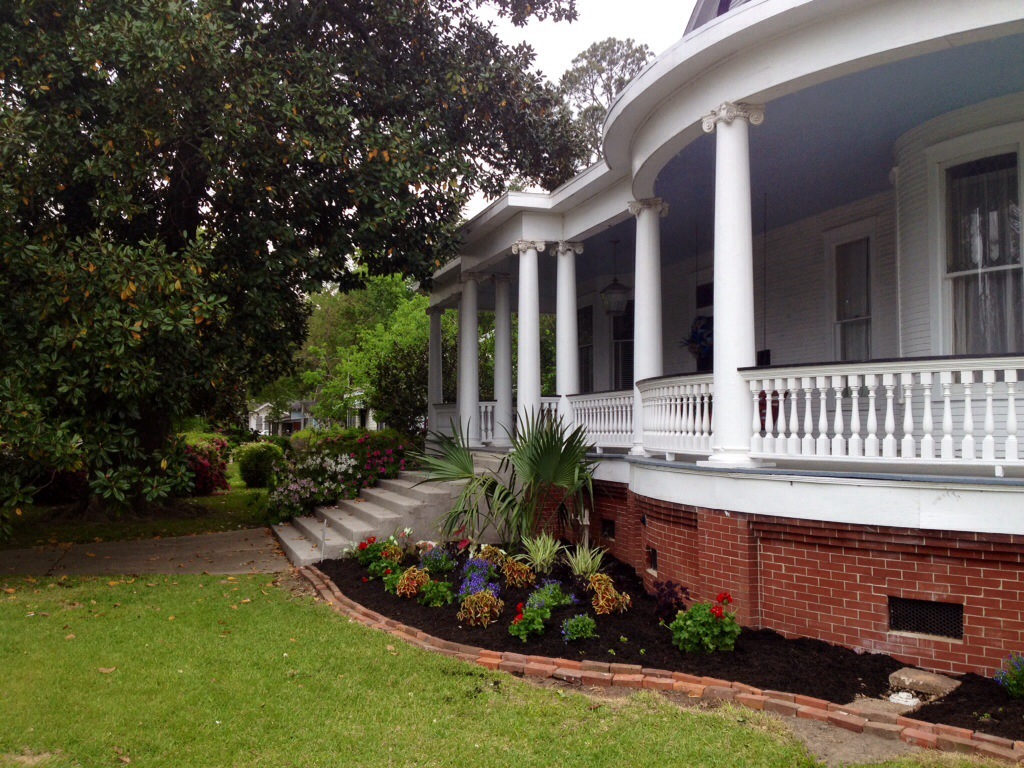
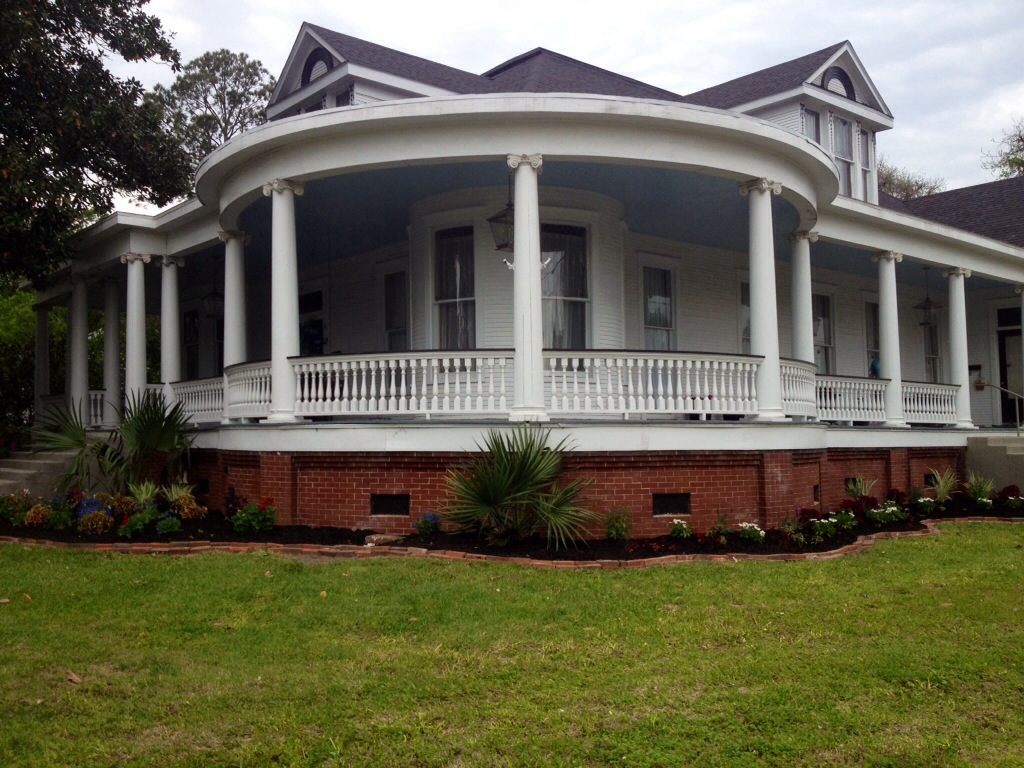
This is probably one of my most favorite projects to date. Landscaping! Not that I know what I am doing or have a green thumb, but I have dreamed about pretty flowers in the front yard forever. Over the past two years, I have looked into full sun plants and different varieties that grow in Louisiana. Last year for mothers day, I think, my husband bought me a book called Louisiana Gardener’s Guide. This book has been my go to when laying out the new flower beds. It shows many plants that thrive in our hot weather, as well as when to plant them and how to care for them.
Another great resource was a video entitled “How to design a garden.” Some of the questions it asks is: What is your purpose? What kind of plants do you need to buy? Focal point in your yard? Everything should be visually balanced. This video made me make a list. Far too often I see yards that have all of these plants haphazardly placed and it just looks weird. I didn’t want my yard to look that way. We pulled up, to the consternation of our neighbors, some of the different shrubs that were scattered across the yard in different places. I really wanted the front yard to make sense and to be visually pleasing.

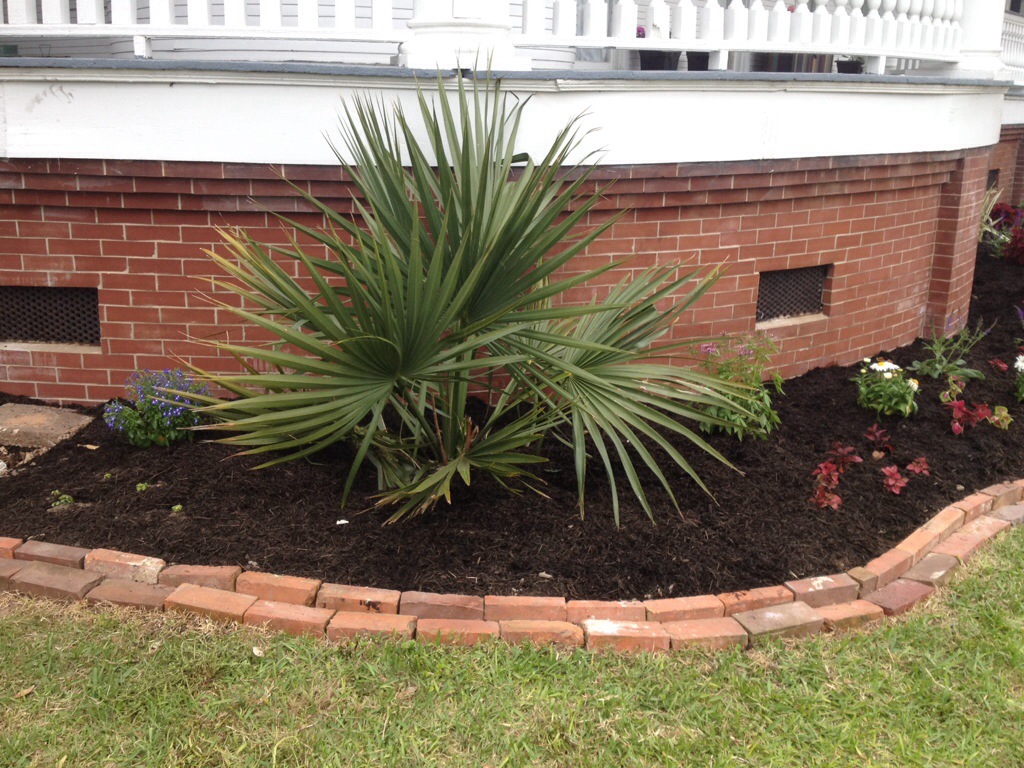
The azaleas above we kept. They are on the left of the entry stairway. they are beautiful and did not have much ivy growing in their bed. The bed to the right of the stairwell had poison ivy ropes bigger than my thumb!!! We were always battling “the jungle” over there and decided to just level it and start over. The only thing kept were the two dwarf palmettos. I was looking at the pictures of the house when it was built and I am almost positive I can make out a grainy dwarf palmetto where these two sit. So, it is possible that they are original to the house.
Here is another video about laying out plants and flowers:
Here is a video about: Landscape design basics. This is a simpler design than the previous video.
Another great tip was that amateur gardeners (such as myself), tend to go and buy a bunch of plants and expect them to get along. Sometimes too many plants are bought and not given enough room to grow. These were all things I took in to consideration when sketching my plan.
So, after figuring out what plants would thrive, the next thing I did was visit a few local places to see what they had. I am sad to report that the big box home improvement stores had very little to choose from and that most varieties of plants were not very hearty in our weather. So, I skipped those and went to Fads and Frames, a local hobby/craft/nursery here in town. WOW! Not only did they have an amazing selection of plants, most of them were sourced from area nurseries in Forest Hill and the staff was very knowledgable. One awesome man saved me from buying three plant looking shrub things that can grow up to ten feet tall!!! So glad he pointed that out! I wanted something tall in the back of the bed, but not THAT tall! haha.
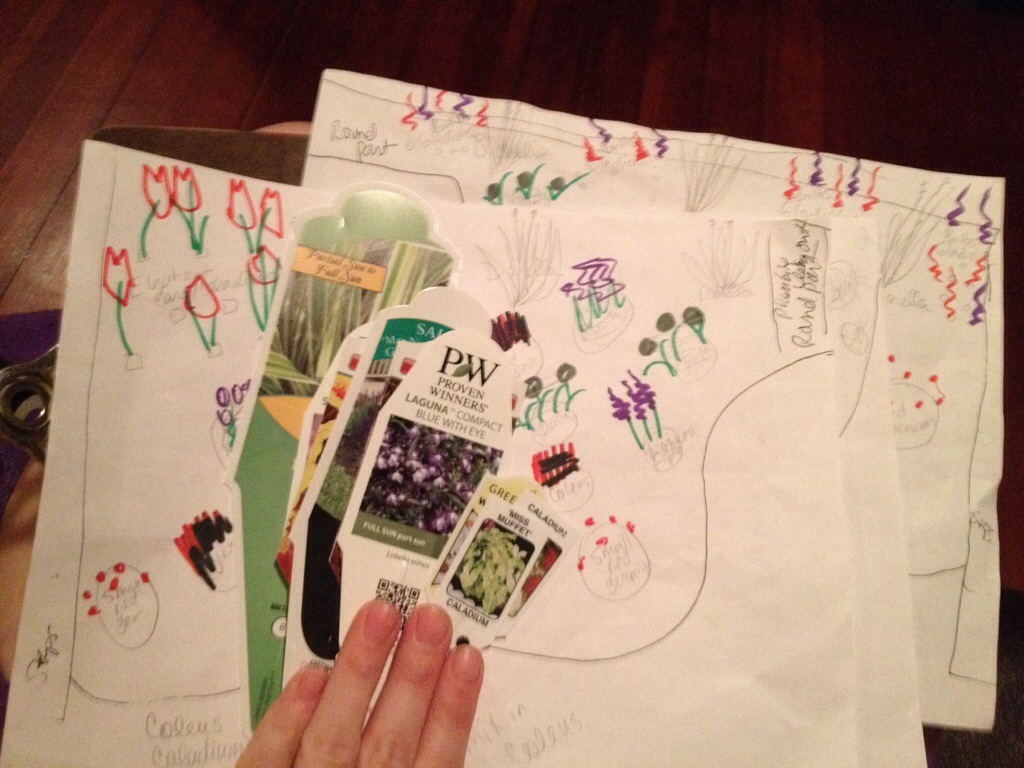
My sketched plan!!!!
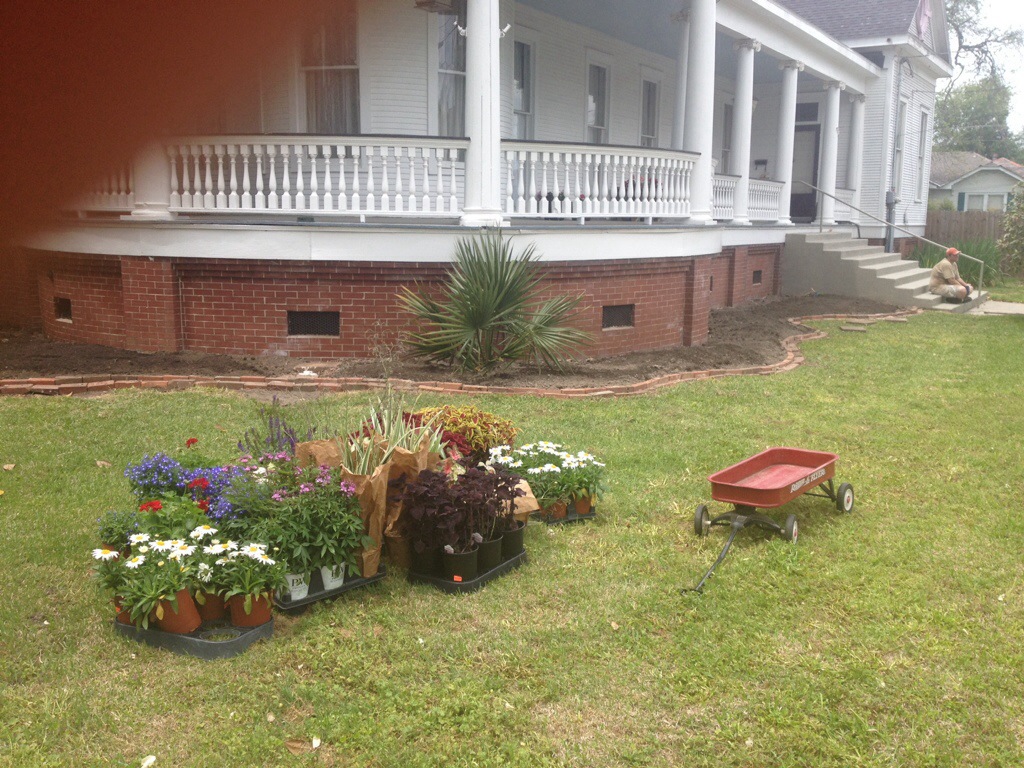
I loaded up my car a couple times and brought my plants home. According to the advice above, experts say when starting out, pick three colors and bring them all the way down and around the full length of the bed so your eye will follow it and it will be pleasing to look at. I thought this was great advice! I chose red, white and purple. The left side of my bed gets partial sun and allll the way to the left, in the summer, it gets mostly shade. The bed that curves around the house and is on the right side of the house gets full sun. At least 6-8 hours a day. So, I knew that I needed to pick different flowers for either side. But, I still wanted to keep to my red, purple and white. I poked around a couple days and went back and forth, took pictures, sketched it out and then found enough plants within my color scheme that would work and that were not too fussy or hard to take care of. This is how it went:

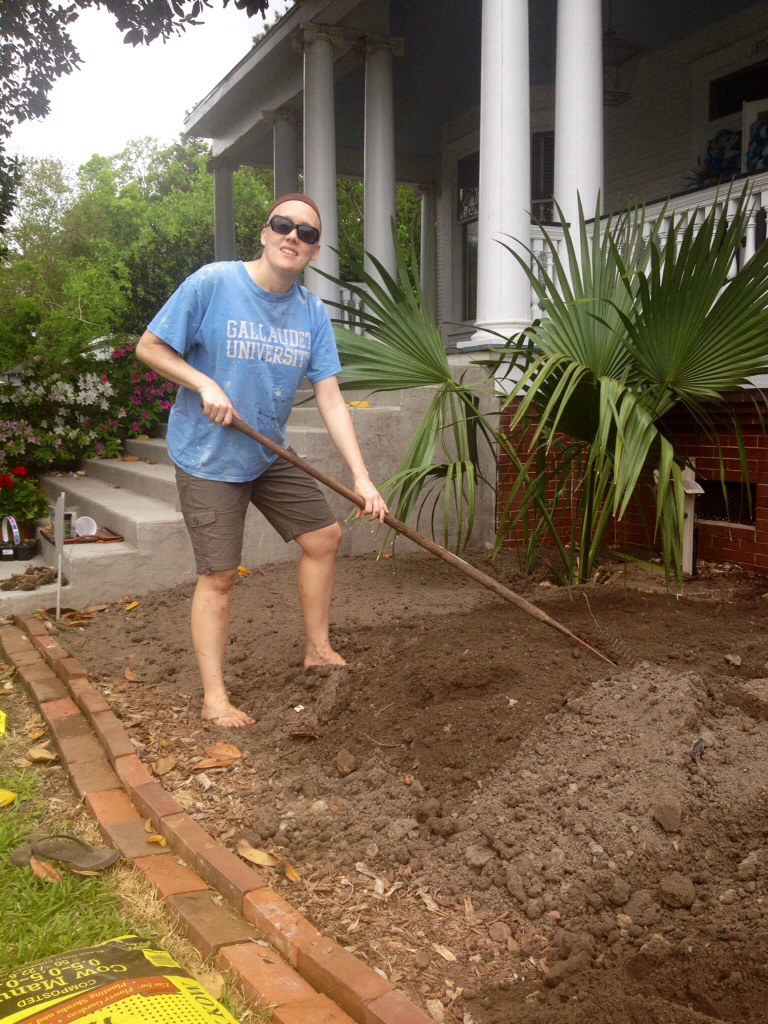
Forgive my photography and my finger in the frame above. I had the sun in my eye and did not know, until right now, that I managed to get my finger. Oops! The first thing we did was lay out black thick trash bags, contractor grade, over the grass that we wanted to kill so we would not have it coming up or taking over our flower beds. We left it like this while the brick work was going on and due to it getting moved accidentally and the high winds, we had a couple spots that got uncovered and the grass never fully died. That, combined with it not really getting very hot and staying cool, it did not kill the grass as well as we hoped. Going back and reading, it is better when you do it and the area has full sun and gets hot. I already bought the flowers, so I really did not want to wait. I also used round up “everything” killer to spray along the bricks in the back of the bed and also in the front of the bed. We have a very aggressive variety of St. Augustine grass and I wanted to make sure that it was knocked out in the back and front of the bed. It also helped when we laid the brick border that the grass was already dead. Our grass has been known to take over stepping stones and bricks. We have had to dig them out. I will most likely spray round up around the border once or twice a year, just to keep it at bay and out of the flower bed.
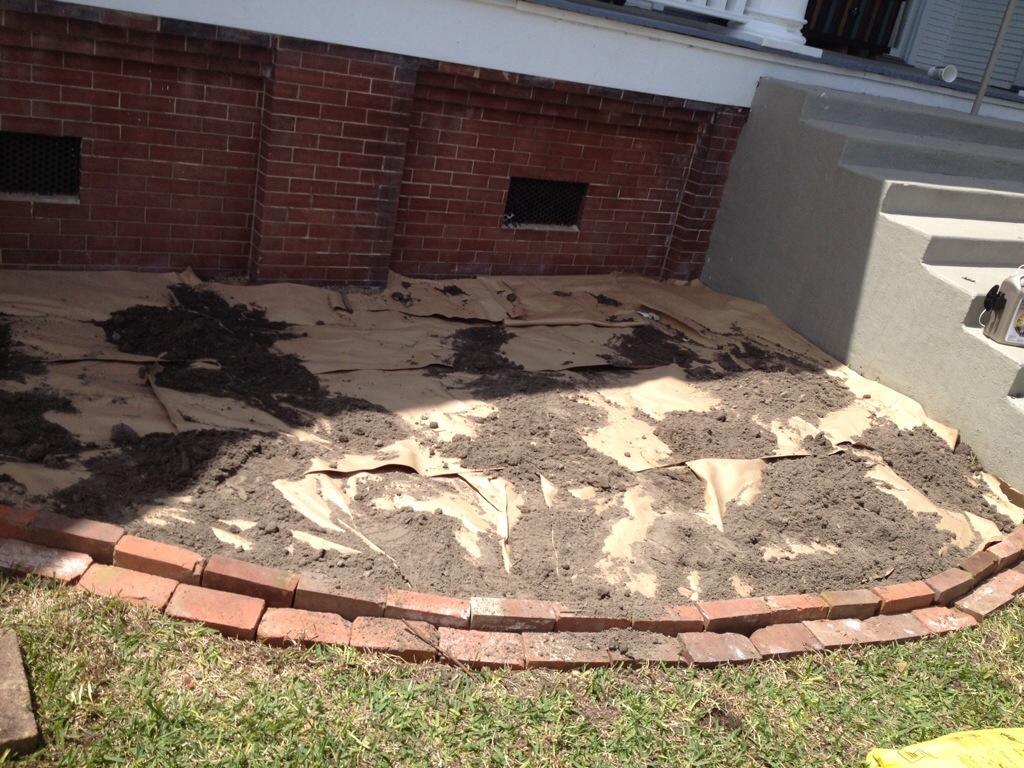
On to plan B which was laying kraft paper over the half dead grass and shoveling the new topsoil on top. You can also use newspaper or cardboard. Using paper, cardboard or kraft paper is more natural than using landscape fabric. I was reading that landscape fabric is petroleum based and does not really “return to the soil”. I really wanted whatever we laid out to disintegrate that, and the worms like cardboard and paper. When they eat it, they basically compost it and keep your flower beds rich with microorganisms that flowers like. So, kraft paper it was. I happened to have a roll left over from another project and interestingly enough, it was exactly how much I needed.
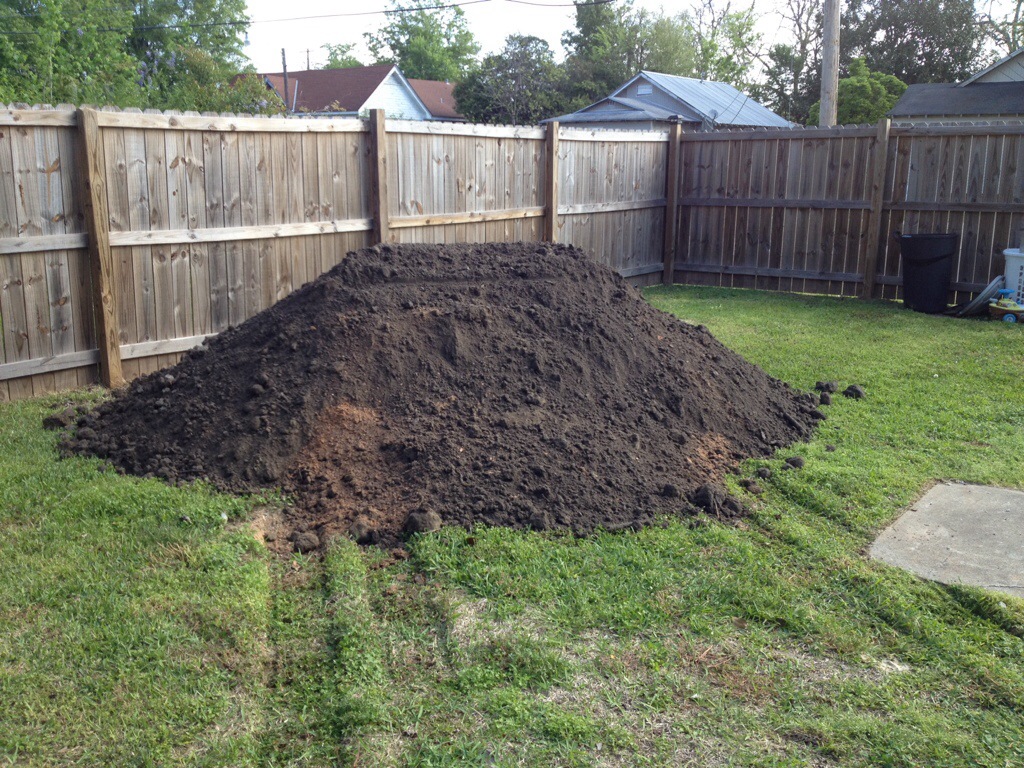
The topsoil I had delivered and pictures of laying the kraft paper.
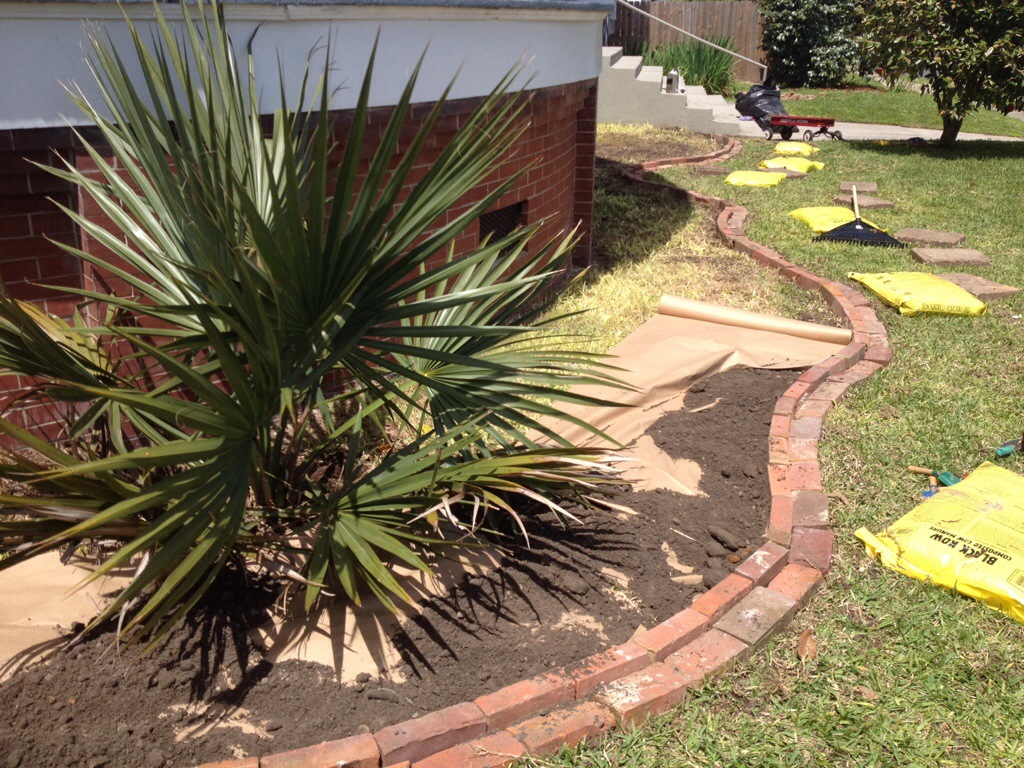

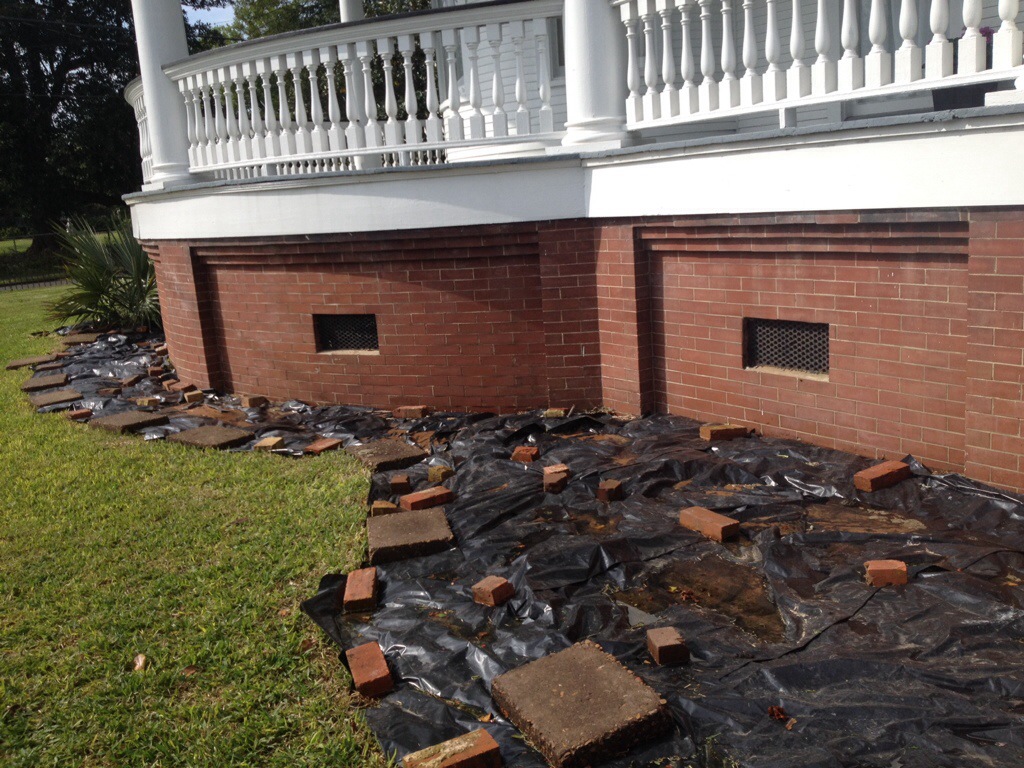
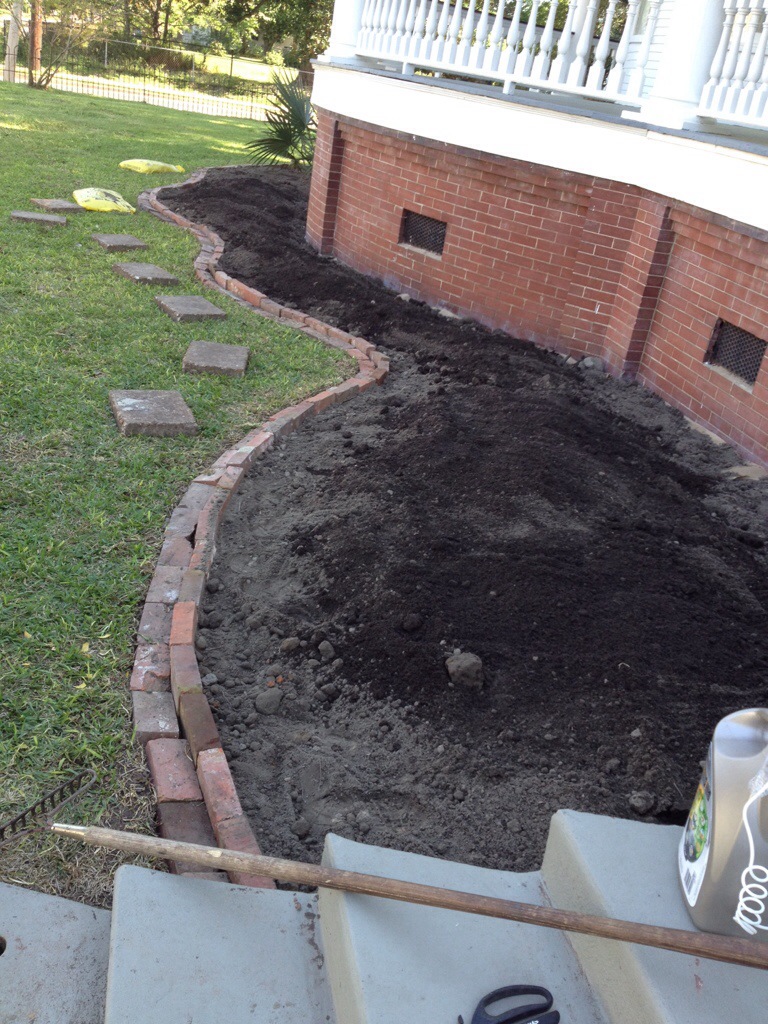
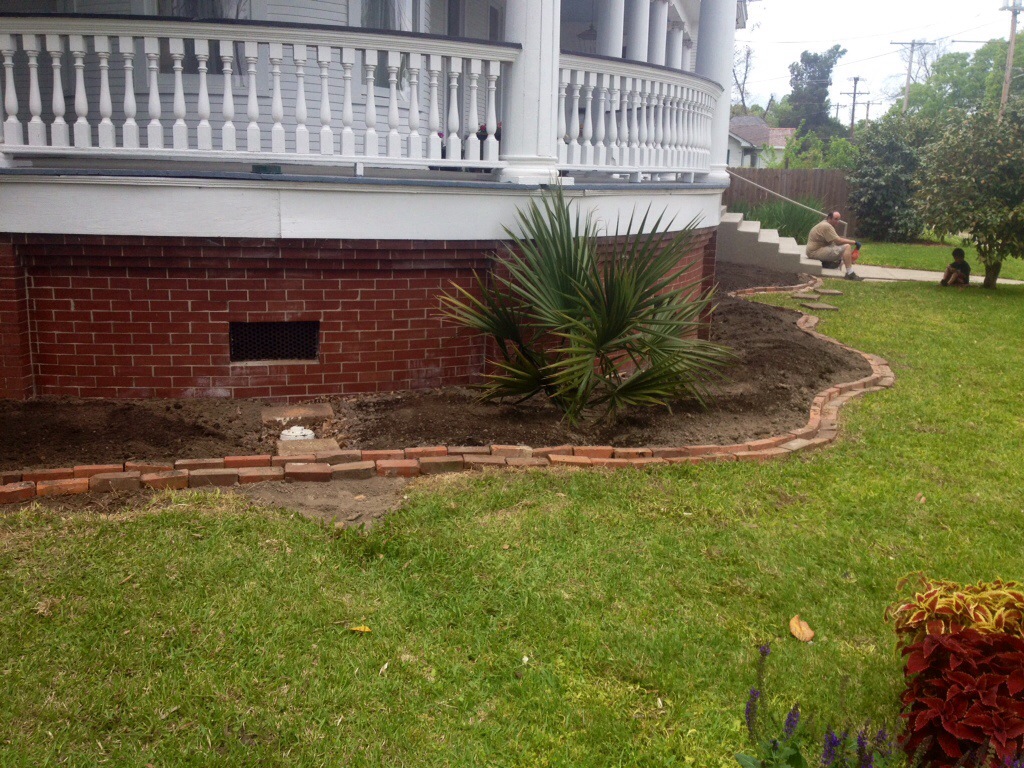
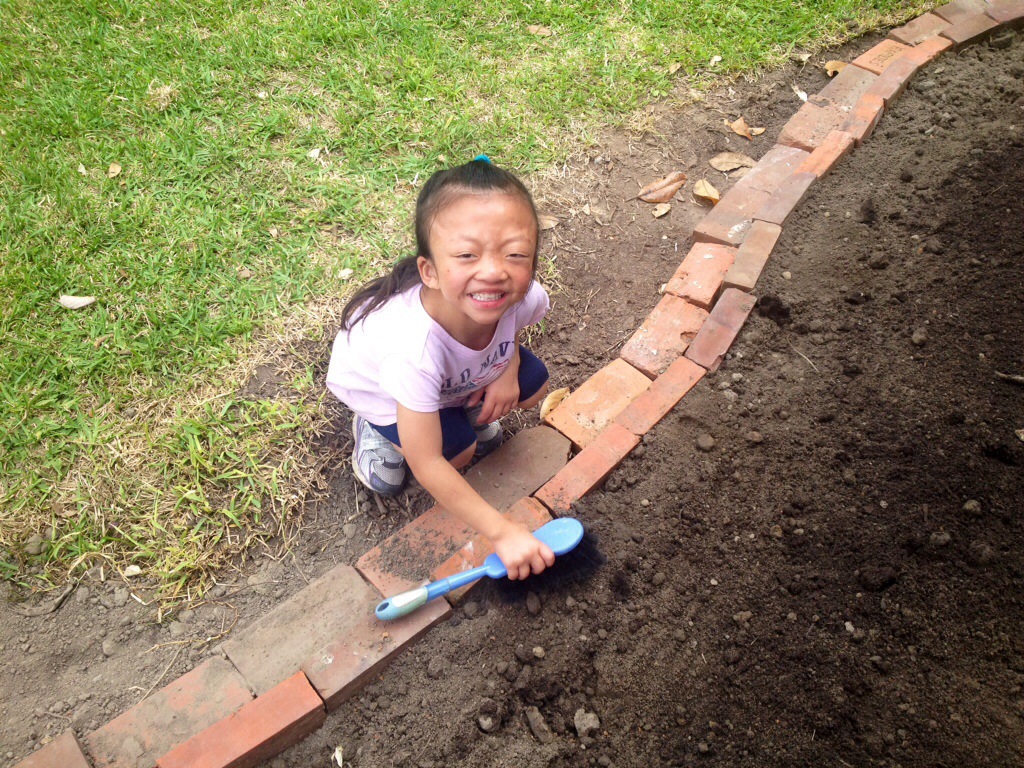
I used an old hose to map out where I wanted to set up the brick border for the flower bed. We have piles of bricks in the back yard. After the brick mason used all the bricks he needed, that left the rest up for grabs to be used for the flowerbeds. Most of the bricks are from the chimneys that were taken out, plus there are street pavers and old “Rapides” bricks. We did not even take a small dent out the huge pile. Geez! I guess that means I have plenty of bricks for backyard landscaping too!!!

After doing all that. I laid out on the porch with my tongue hanging out telling myself that I was getting too old for manual labor! 🙂 It was then that I noticed that the porch light is hung crooked…..sheesh…another thing to add to the “fix it” list.
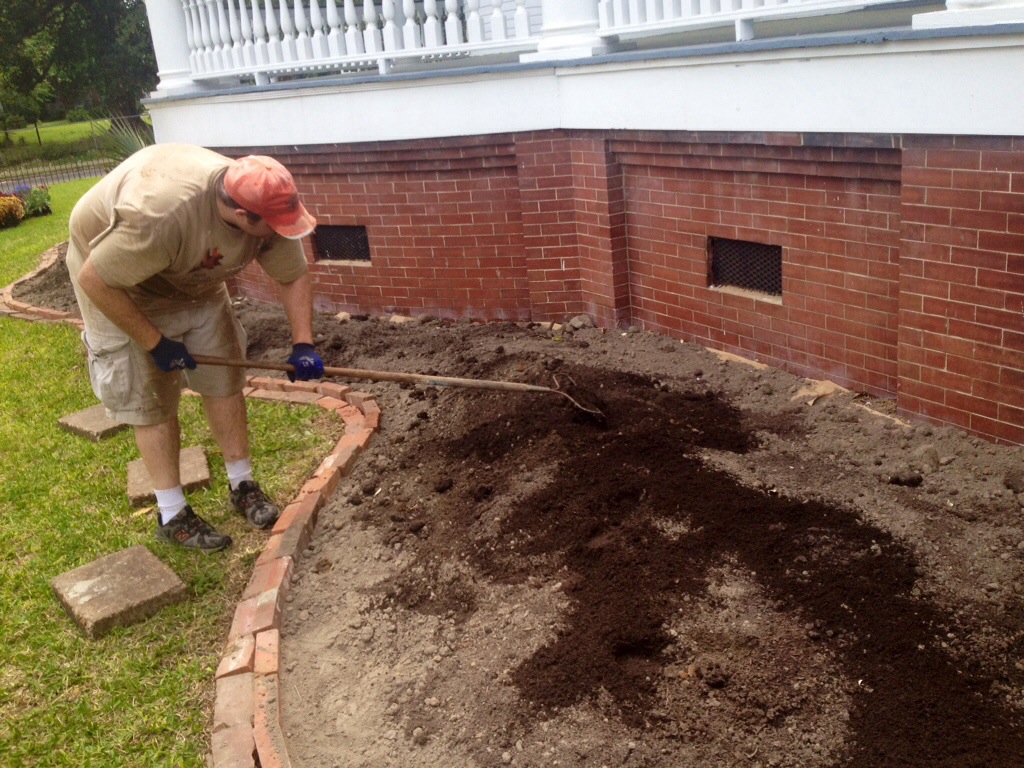
We wheeled around the topsoil and mixed in Black Kow manure compost. My kids were absolutely fascinated that we were putting “cow poop” in our flower bed. It was really fun trying to explain. It was even more fun listening to the silly songs they made up about “cow poop”. hehe
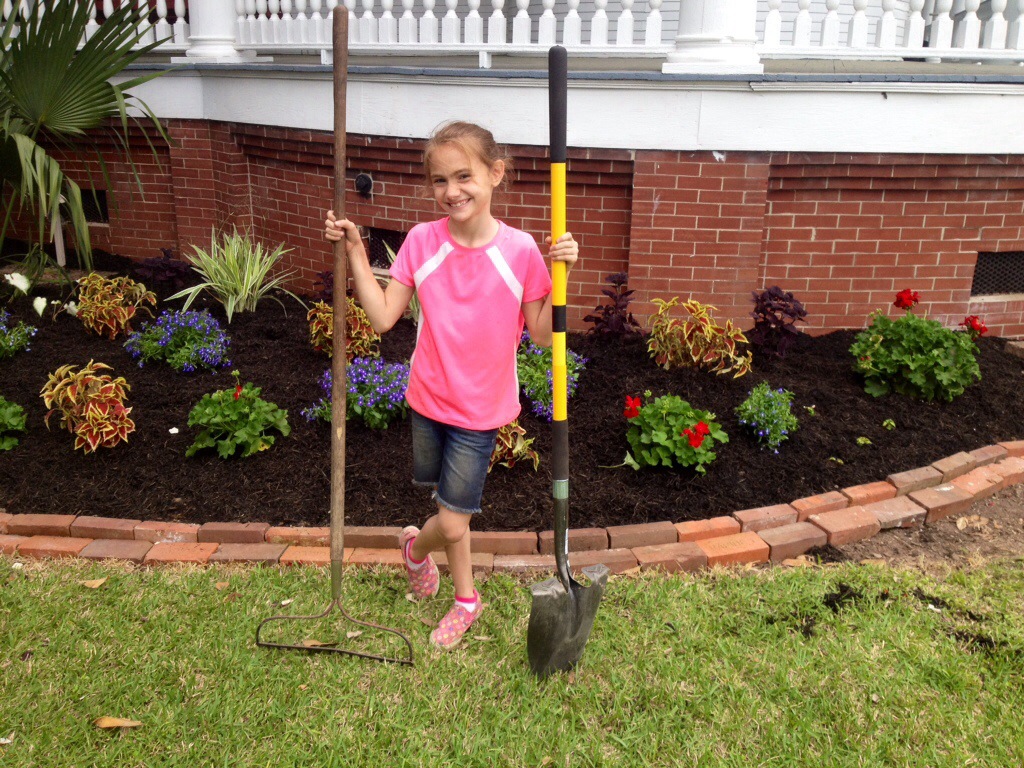
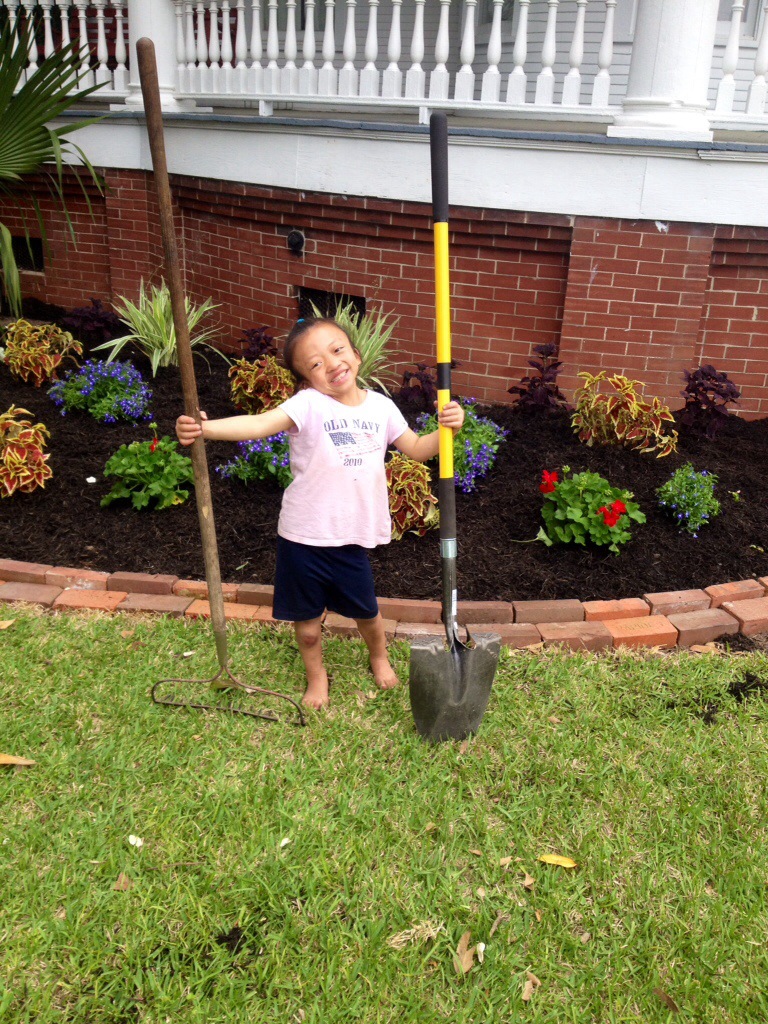
Goodness, there is that finger again! Time to bring the flowers around and to lay them all out according to the plan I sketched to see if everything is going to work out. The kids helped us with misc. chores as you can see. They had a lot of fun and were excited about it. (Now, even two weeks later, they ask how “their” plants are doing and help me water them. I am happy that they take pride and ownership in this project).
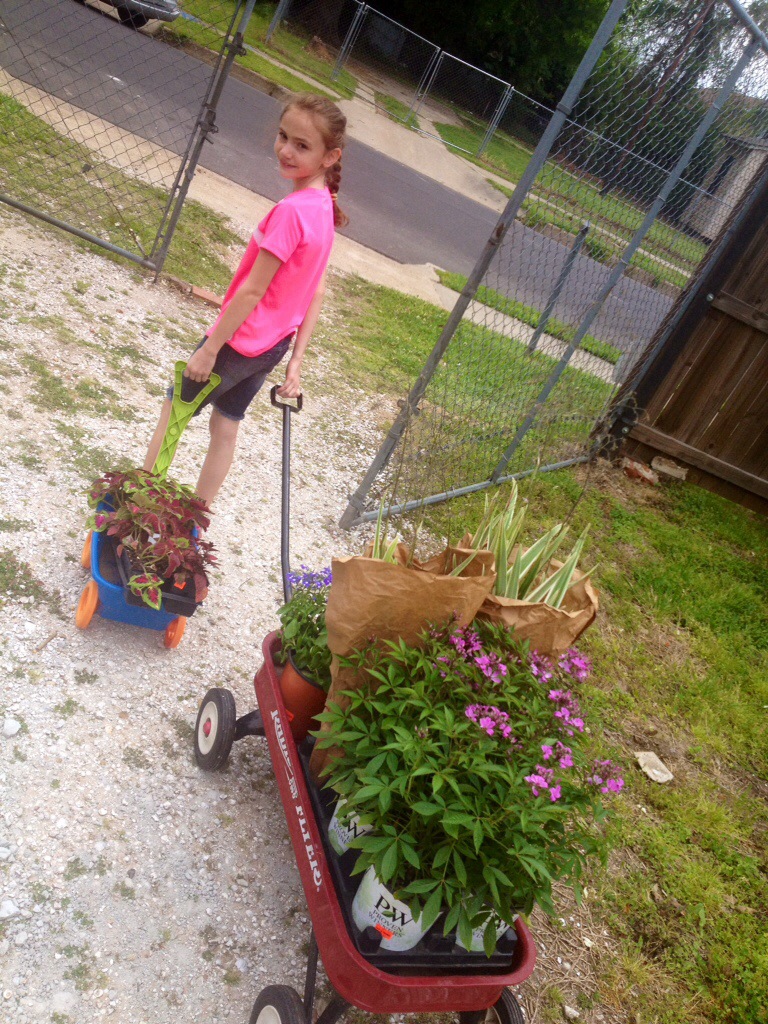
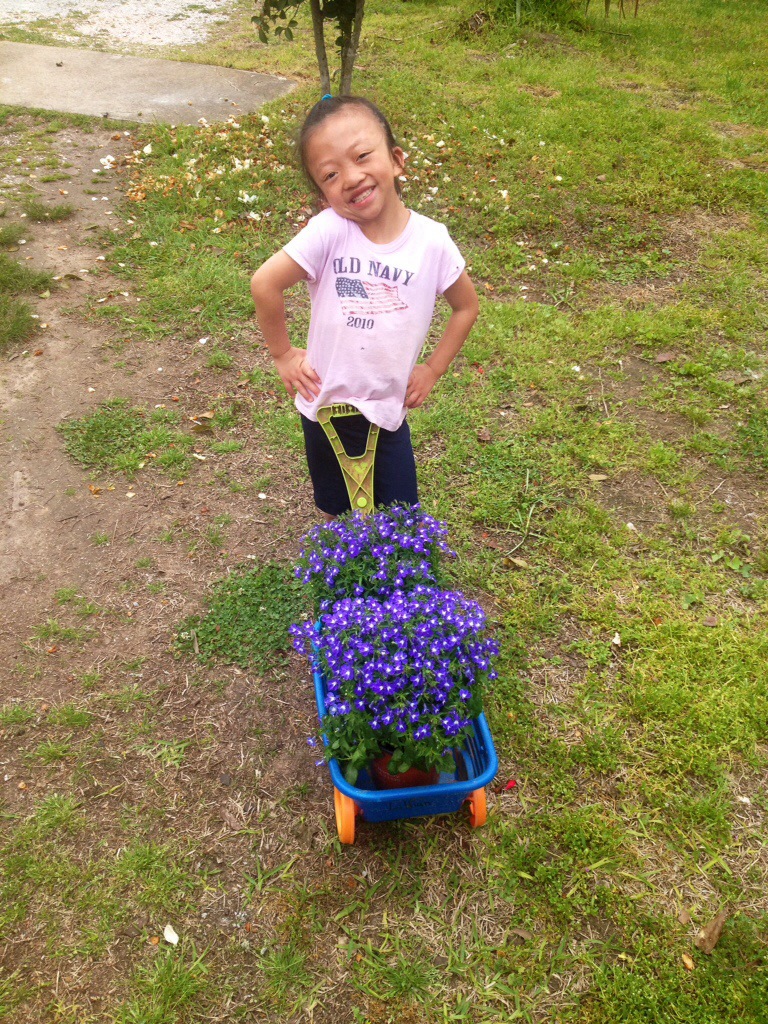
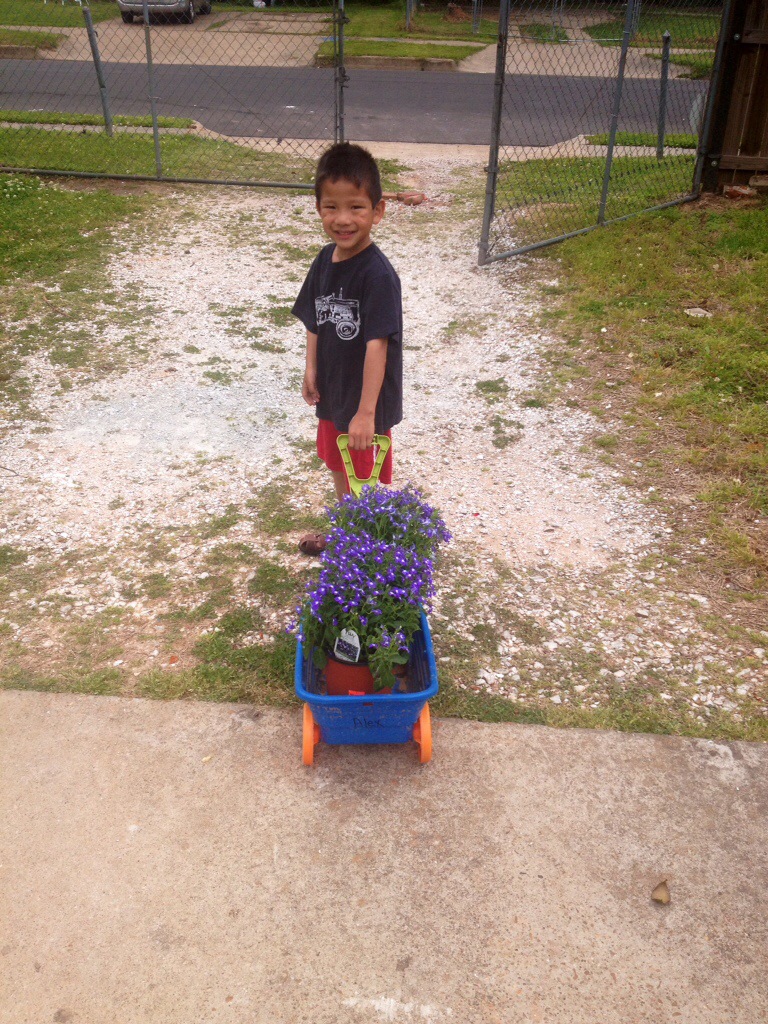
I quickly learned that saying “put the caladiums over here, put the Dianella over there” meant absolutely nothing to anyone but me. So, instead, I just handed them the plant tag and said “go find this plant and put it there”. That worked!
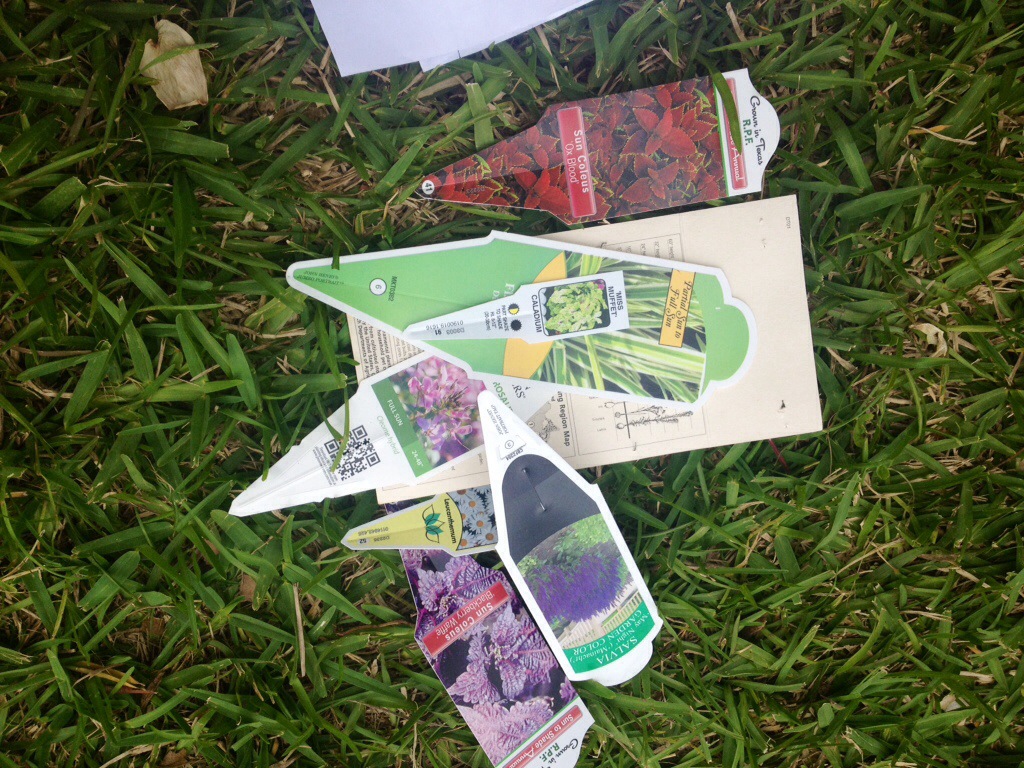

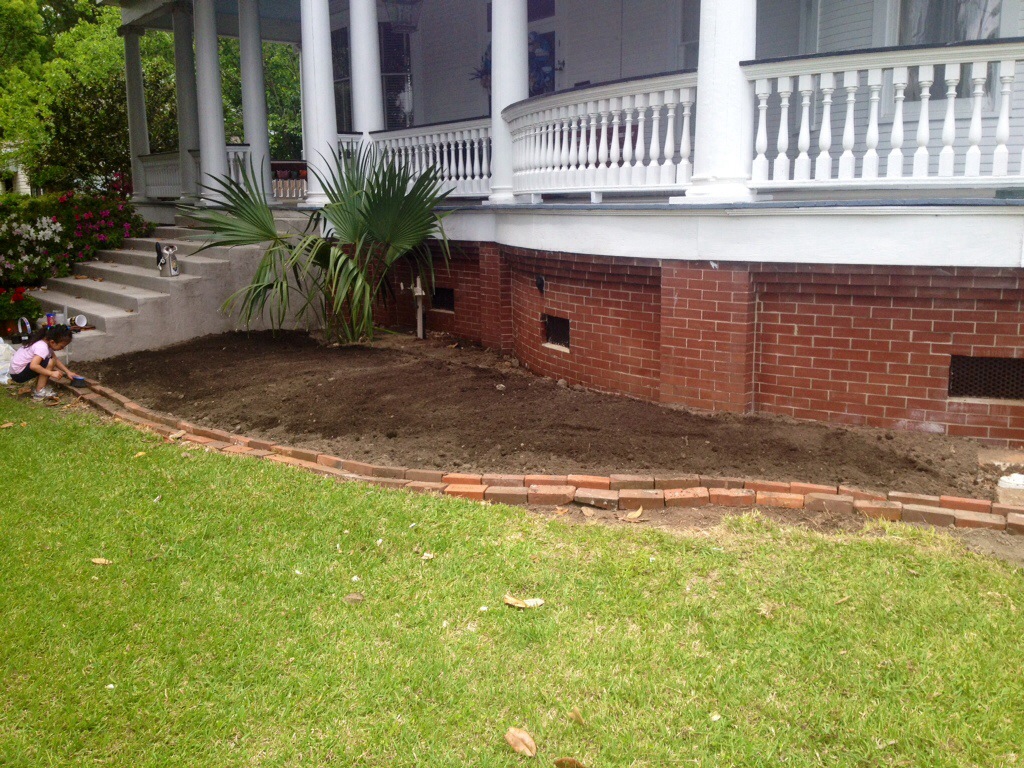
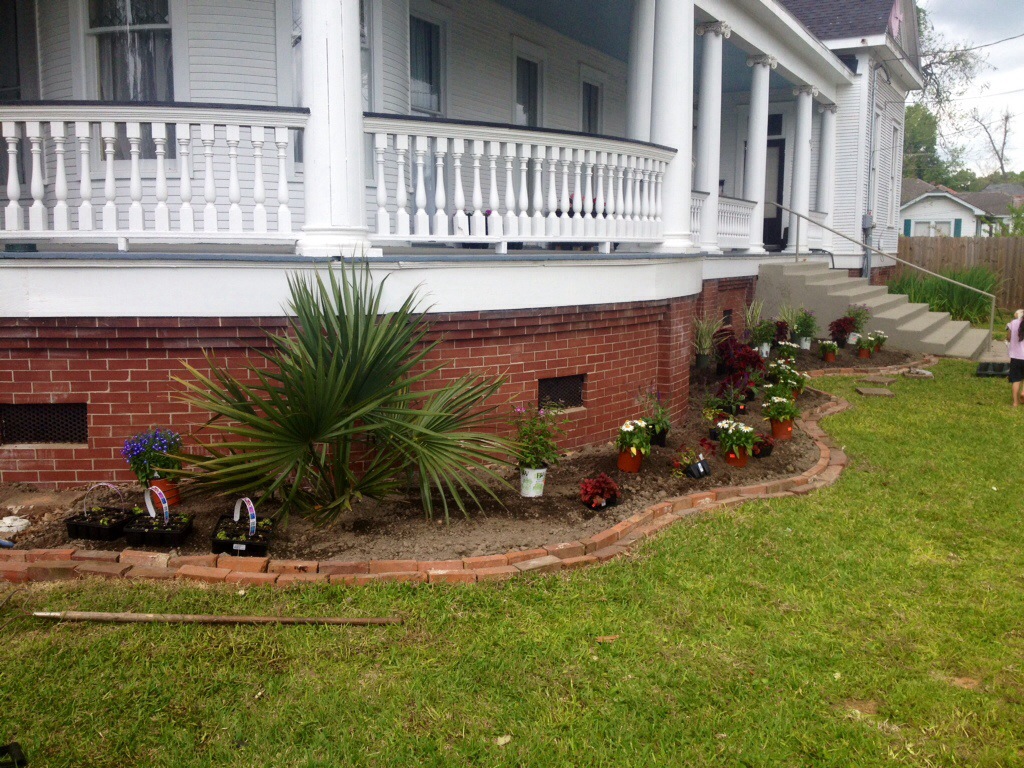
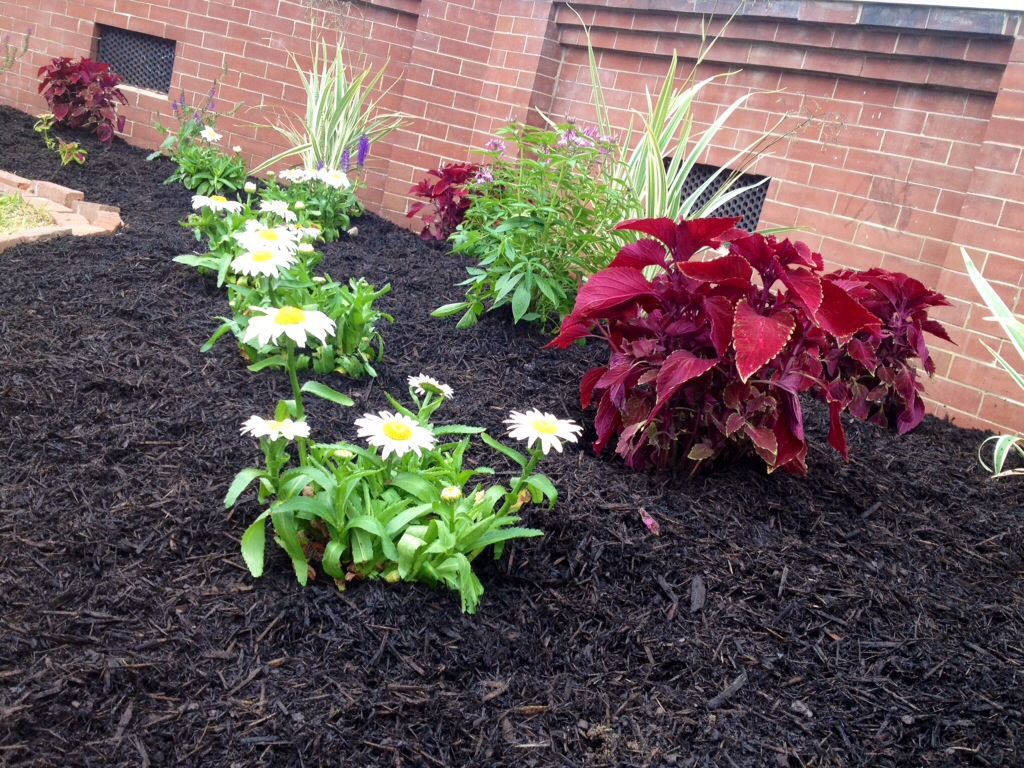
Here it is all laid out. I was pleased to see that I bought enough plants and that everything worked out nicely. I left a lot of space in between the flowers to give them room to grow and spread out this summer. A couple varieties, like the shasta daisies, like to have lots of room.

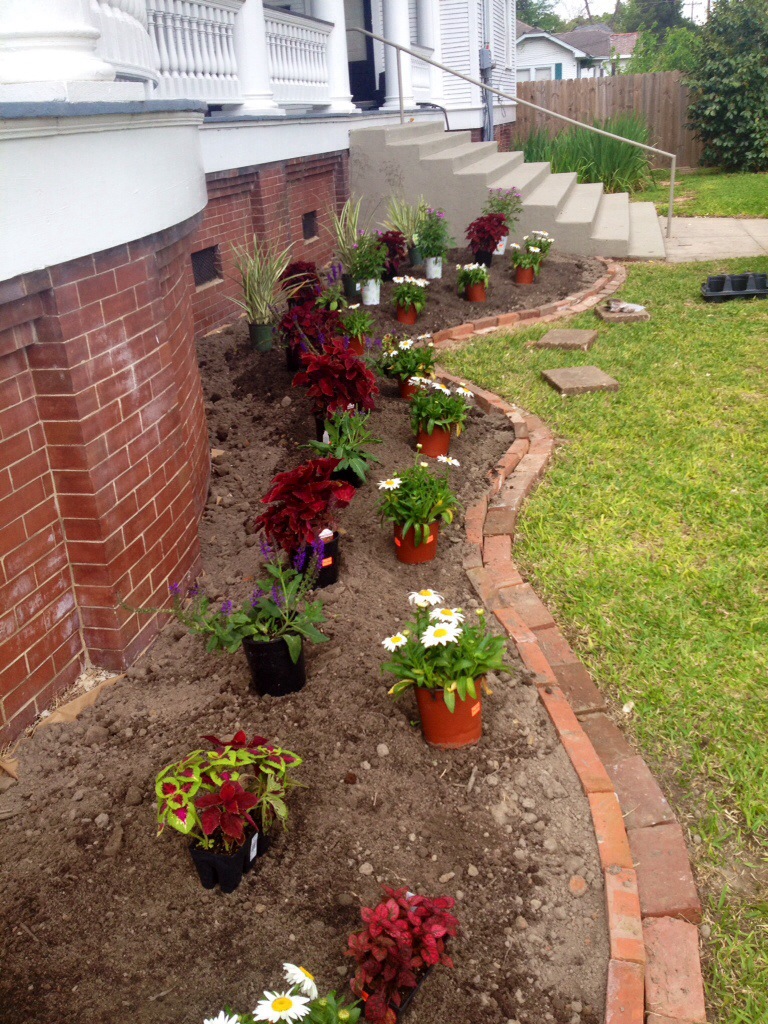
In the picture above, you can see a very old yellow iris bed. We had an old pecan cut down last year right in front of the bed. It was getting brittle and dropping limbs. Now that it is gone, this bed gets a lot of sun. In the eight years we have been here, I have never seen these irises grow like that!!!! I was reading that irises need to be culled every 2-3 years and redistributed. I have never done that. I guess, now that I know, I will do that this fall. I also learned that irises will not bloom unless you cull them and they have enough room to grow and get enough water. They are very compacted, several layers deep. Sounds like a good fall project!!!!
We did have one lonely iris bloom on the edge of the bed. He must be new and got enough water.

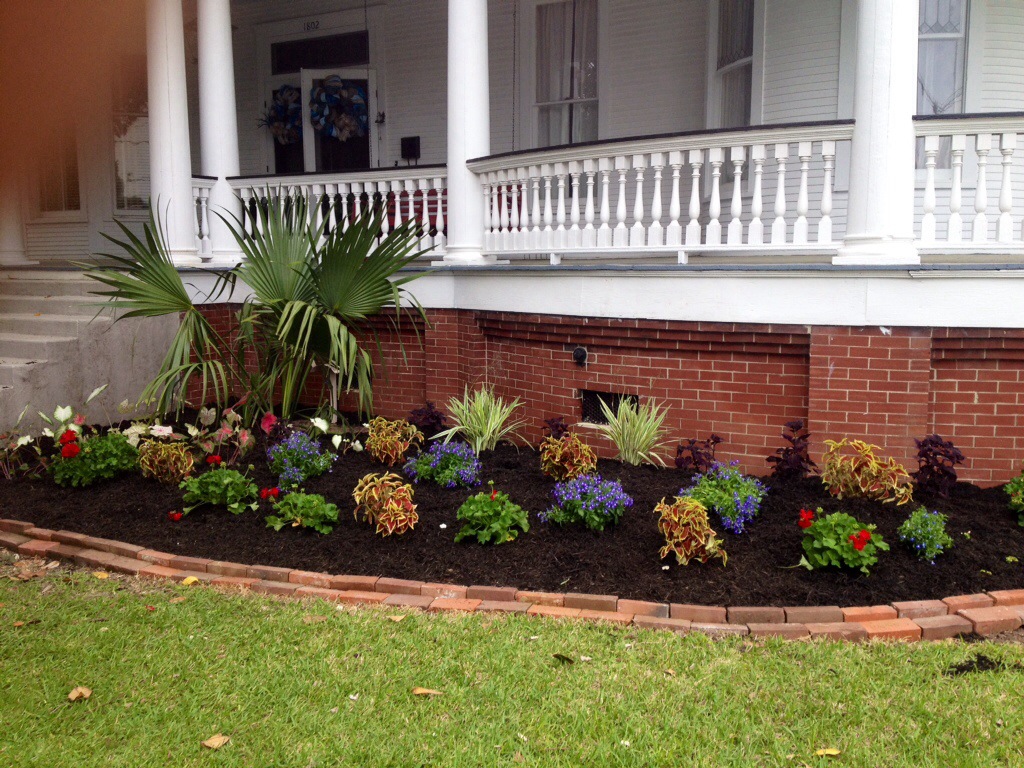
After we got them all planted into the ground, we put black mulch on top to keep the weeds out and to make it look purty. 🙂 (There is that dang finger again….sigh…my photography skills are seriously lacking).

Ewwww yuck! We got the job done though!
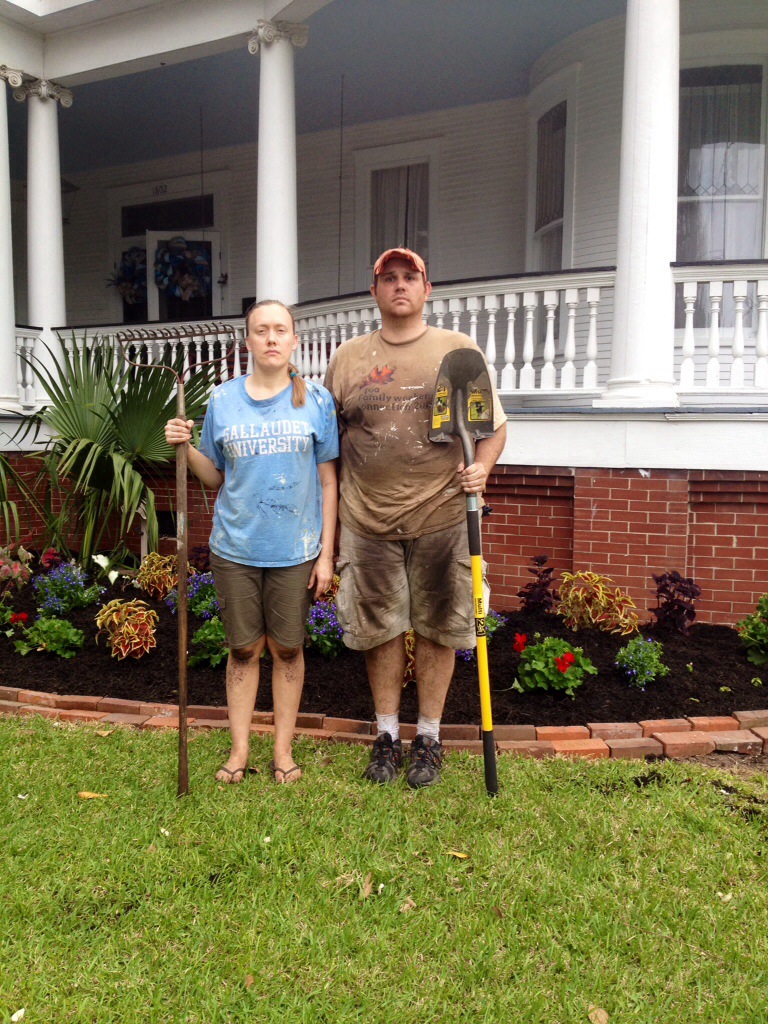
Dirt pile before, dirt pile after! That is a LOT of dirt…ouch my back!!!!

Anyone need some starter pots for square foot gardening or misc projects? Shoot me an email! Reduce, reuse, recycle!!

Some things you don’t see: the tiny dwarf palmetto we planted all the way to the right of the bed so that we would have a third palmetto. We found it close to one of the other established palmettos and moved him. Rule of thirds. Also, we planted about 3 dozen gladioli bulbs along the back edge of the far right corner by the steps. I have not had very good luck with bulbs. They should start coming up soon as the ground gets warmer. According to the package, April is the time you plant them in Louisiana!
So, there you have it. Amateur gardening. Not sure what will happen, what will die, what will thrive, etc., but I will keep you posted this summer. If anything bites the dust, I will make a note of it and try something different. Right after I planted it all and mulched it, I watered the beds thoroughly. The next day we had lots and lots of rain, so that made them even happier. I have tried to go out and water them every other day (they have been in the ground for two weeks now), to make sure they get good and established. There are couple of them that do not like to stay drenched, so I made myself a binder with all of the tags showing the watering schedule. I am hoping this helps keep them alive a little longer. I am always amazed that there are some plants that do not like too much water. That is almost like bears not liking honey. Its just not right. Haha.
A list of what I planted starting from left to right:
Caladiums (red. white and purple-part shade)
Laguna (purple- part sun)
Coleus varieties (red, purple – part to full sun depending on the kind)
Dianella or wax lily (white spiky grass thing in the back – full sun)
Geraniums (red – full sun)
Shasta daisies (white – full sun)
Senorita rosalita (purple – full sun)
Salvia (purple – part to full sun)
Thanks for stopping by. I plan on taking pictures throughout the summer to see what happens.
Andrea
Yesterday, I bought some organizers for my ugly bathroom cabinet and, while I was at it, painted and put in pretty contact paper. I just got tired of looking at the ugliness. I had a roll of contact paper leftover from lining the kitchen drawers and paint leftover from painting my farmhouse table. Ahhhh….organization!!!
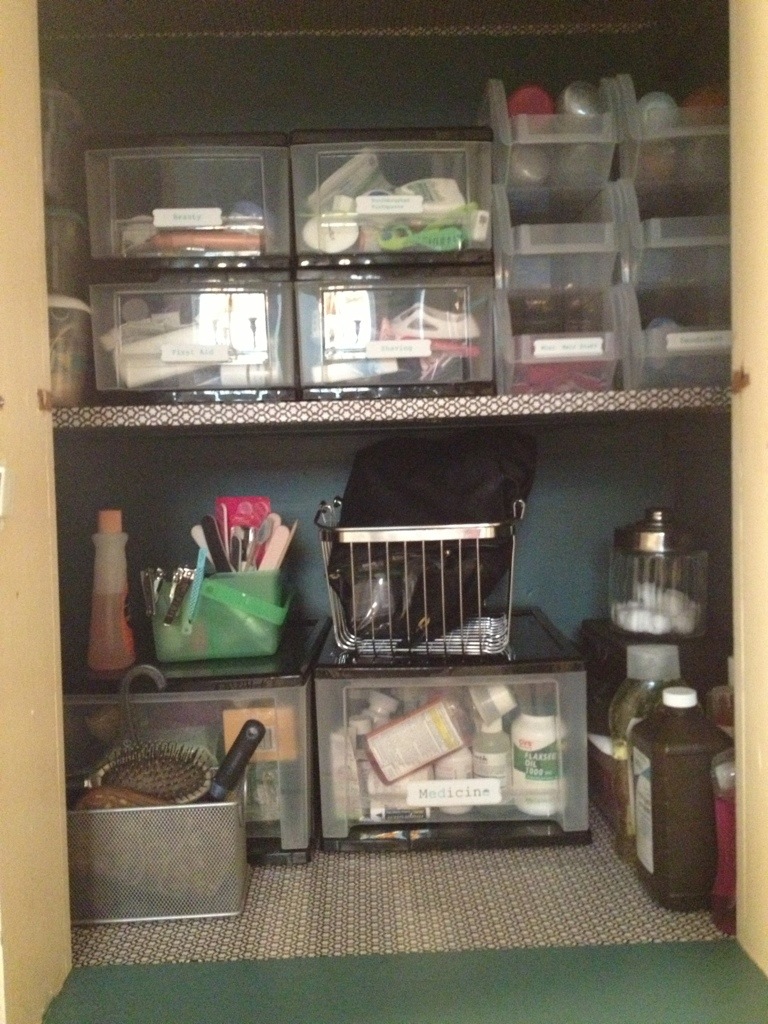
(I apologize for the not so good pictures. My dslr has been out of commission for almost 18 months and I have been using my phone. I am hoping to return to better quality pictures soon with the purchase of a new dslr).
